A Fancy-Schmancy Blue Velvet Dress

I’m back! Already! Miss me? 😉

I love this time of year for “fancy dress season” reasons. As you may have guessed, I kept my tradition going and made yet another fancy thing for my office holiday party. Yay!

This year I went a somewhat stereotypical “holiday dress” route: velvet. Much like florals for spring, it’s hardly groundbreaking. 😉 I also decided early on to jump into Linda’s Designin’ December challenge once again, as I found an amazing inspiration dress a few years ago and couldn’t get it out of my head.

Nice dress! Thanks, I made it!!

Image property of Linda @ Nice Dress! Thanks, I made it!!

20181224-Abbers-01120181224-Abbers-007

Here’s my inspiration dress, which was part of Elie Saab’s Fall 2014 RTW collection:

velvet

Photo property of Vogue and/or their credited photographer(s)

Like I said, I first saw this a couple of years ago and it’s been in my head ever since! I knew I didn’t want to copy the exact style of the original dress, but 100% loved the draping, the color of the velvet, and the ombre effect. I found my dark teal poly/lycra stretch velvet at Fashion Fabrics Club and planned to dye the dress from the hem to the waist in a navy ombre; however, I couldn’t get the velvet to take the dye I bought (which was for synthetics). 😦 While I’m happy enough with the dress in one color, I definitely would have preferred it with the gradient effect that I envisioned!

20181224-Abbers-009

Full-length shot

The pattern I (mostly) used is Burda 05/2012 #133. (Julia Bobbin also made this pattern and she looked fierce!) I did make some changes, as follows:

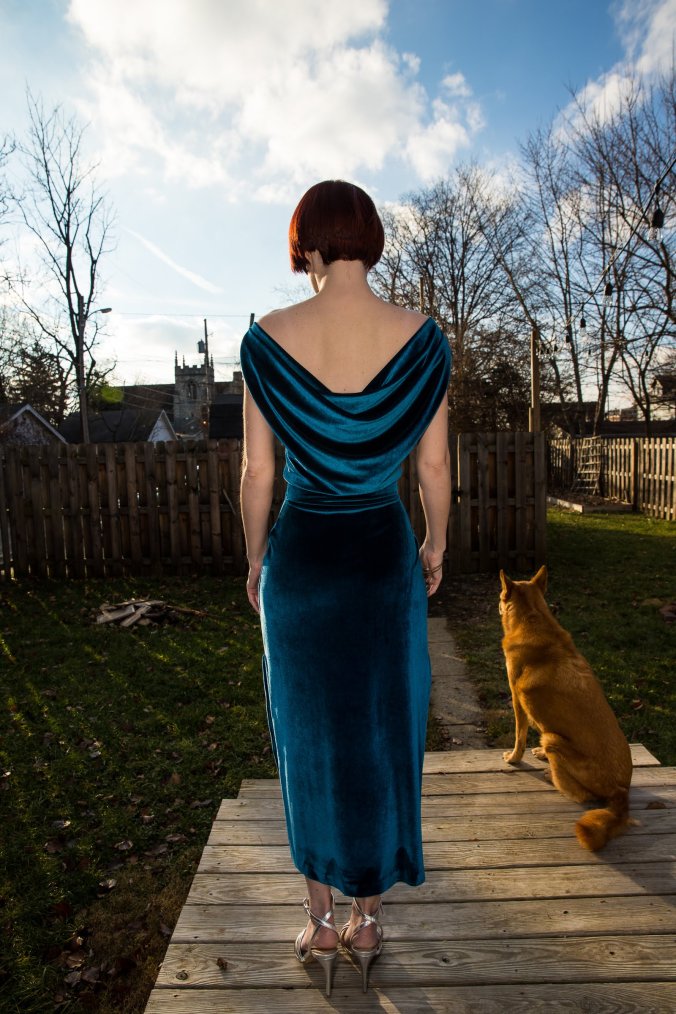
  1. Adjusted the neckline: The pattern photos on Burda’s site are somewhat deceptive, as my mock-up per the pattern didn’t drop the back neckline as low as theirs. Then again, I kept my material on the straight grain rather than bias for the stretch factor. Anyway, I was determined to drop the back much lower. But after reworking the back bodice and starting from scratch using my moulage, it just wasn’t coming out how I envisioned. (To get the effect I was after, I’d most likely need to drape the dress onto a form.) In a last-ditch effort to get something with a little more “oomph” than the original design, I added an additional cowl extension to the Burda bodice that originated at the outermost edge of the shoulder; this dropped the shoulders to the off-the-shoulder position you see in these photos as well as added some additional “swag” draping to the back.
  2. Redesigned the shape of the bodice: The pattern bodice has a blouson effect, but I wanted things to be snug. (Not least of all because it would help the bodice stay up without the shoulders for support.) In the end I still could have taken a bit more out, but I had re-sewn it a few times (and had unpicked the waist once–that was not happening again!) and decided it was good enough. Plus I still had to be able to get into it with no zipper!!
  3. Redesigned the skirt: tiny pleats, in velvet, over my stomach? No thank you! Instead, I used the skirt pieces but eliminated the pleats and darts, and simply took the waist in until it was tight enough. I also lengthened the skirt to a midi (it’s now 34″ long, I think?) and added high splits to the sides. Originally I wasn’t sure about that last part, but when the back wasn’t dropping as low as I wanted they became necessary for some sex appeal.
  4. Omitted the zipper: Apart from being unnecessary with the stretch velvet, I wasn’t about the wrangle that sewing task on top of everything else! Just thinking about putting a zipper in this fabric gives me the willies…
  5. Omitted the ribbons: Even if I had kept the shoulders of the original design, I wasn’t about the have ribbons flapping around. Ick.
  6. Omitted the lining: Originally this was not my plan. But because I wanted the bodice tight and had zero-to-negative ease at the waist and no zipper, my lining fabric (silk jersey!!) wouldn’t have lent itself well to that choice. Self-lining was right out, because this fabric gets thick. So no lining.
MVIMG_20181215_200347

The best shot of the back I have–it wouldn’t cooperate so well on “official photo” day!

MVIMG_20181215_200233

The best available setting at the party…womp womp.

There’s clear elastic in the waist seam to help stabilize it. The bodice is still a bit long, due to the vertical stretch and weight/length of the skirt though. But doing that did help a lot! The hem and side splits are all hand-sewn, since visible stitching felt too casual for this dress.

The more eagle-eyed among you probably noticed an issue with the dress in the above full-length photos…I crushed the pile along the hem. 😦 I used a towel under the fabric when pressing, but it didn’t prevent tell-tale iron-shaped spots allllllllll along the hem. (Interestingly, I don’t appear to have done any damage with my first pass, in which the iron was laid parallel to the hem rather than perpendicular.) I was gutted when I noticed this, as you might imagine. I tried every available trick to un-crush the pile but nothing helped (just as the internet warned). The only good thing about this disaster is that it’s on the very bottom of the dress, which I doubt anyone paid as much attention to as the top! #smallmiracles O_o
20181224-Abbers-008

So that’s 2018’s holiday dress sorted! It wasn’t quite what I imagined but that happens, doesn’t it? I haven’t even started plotting for next year’s dress–who knows what I’ll end up with!

This ended up being my last project of 2018, so my next post will be a Top 5 post (Hits, Misses, and Highlights). See you there!

Special thanks to Linda for coordinating and hosting Designin’ December once again–it’s a pleasure to share alongside so many creative and inspiring pieces in that sewalong.

Operation Lady Tux, Part 1: Big Reveal and Inspiration

Helloooooooooooo!

abbeytux (12 of 16).jpg

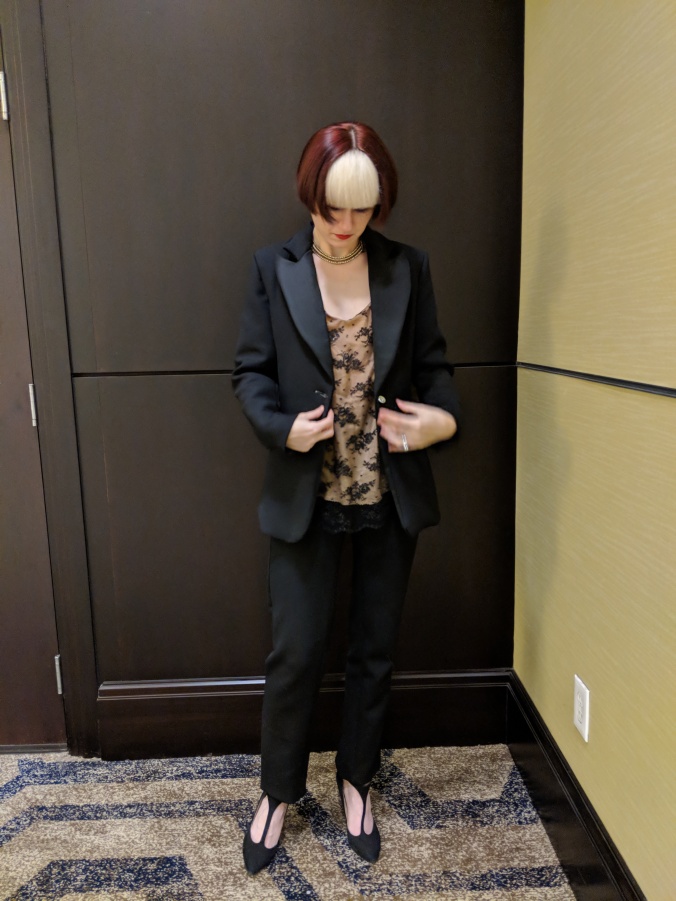
Here I am, having made yet another stupid formal thing for a not-nearly-that-formal work party. 😉 As per usual, it was quite a journey from starting the project to the night of my party, but overall I’m pretty pleased with how it came together. I’ve got a lot to say about this project, not just because things got a little fuck-y, but because IT’S THREE SEPARATE PIECES. So I’ve decided to do a 3-part series: the first installment will cover the big debut of my Lady Tux and my inspiration; Part 2 will cover the jacket; Part 3 will cover the camisole and trousers.

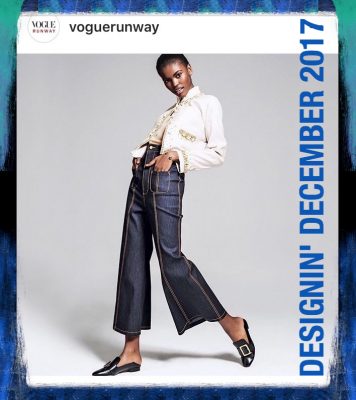
I am also tossing this thing into the ring for Designin’ December, after not playing along last year but finding very definite designer inspo for my 2017 look(s). 😀

img_6128-e1495776761968

Inspiration

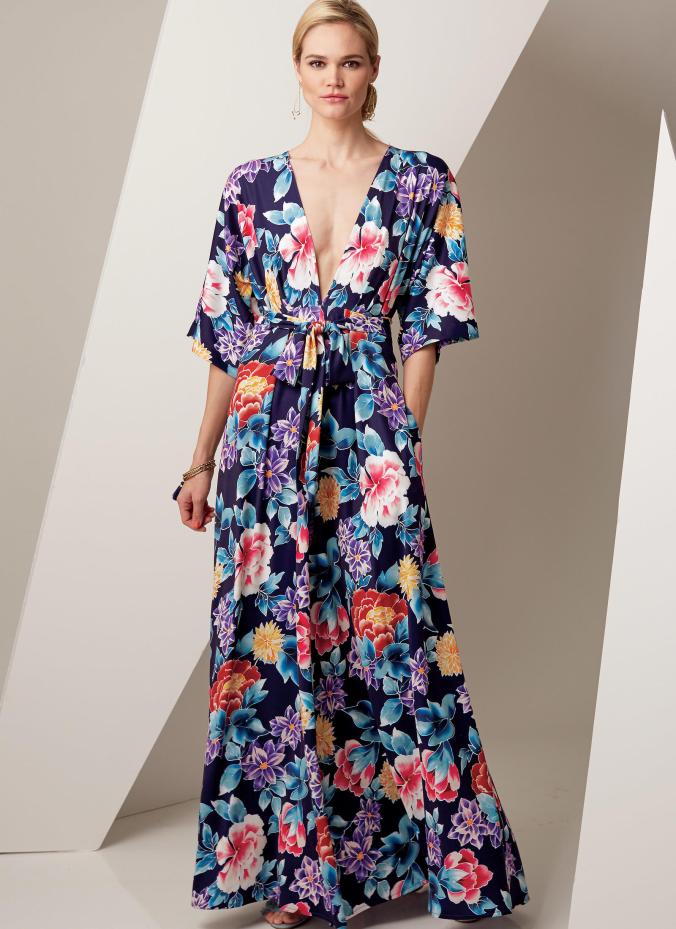
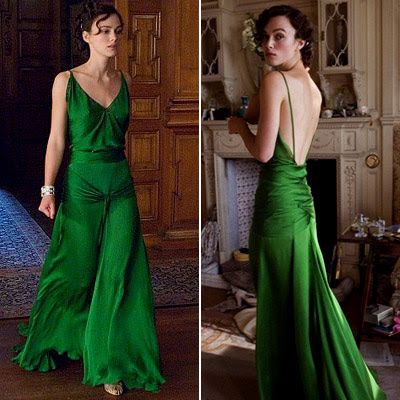
So how did I end up with a Lady Tux? Honestly, it took me some time to figure that out. My biggest issue this year was what type of “Thing” to make. After last year, where I had a very firm idea of what I wanted that was carried over from the prior year, 2017’s outfit was a bit of a second-guess fest. I waffled about what to make starting immediately after last year’s event! Aside from the tuxedo look, I also considered these ideas:

V9253_01

Vogue 9253; image is property of BMV Patterns

Green Dress

“The Dress” from Atonement in all its glory! (Image not mine.)

I had fabrics suitable for both looks, but ultimately decided against them. (I was afraid the Vogue pattern would look too much like a robe or caftan in my black and ivory shibori-dyed crepe-back satin fabric, and couldn’t decide how best to approach the Atonement dress from a pattern starting point.) I had the tux fabrics as well–bought with that intention in mind–and decided I might as well make that for my party! All I had to do was decide on what I wanted it to look like and how to style it–you know, little stuff. 😉 My main inspirations were these two outfits:

That is Evan Rachel Wood in Altuzarra at the 2017 Golden Globes, and Gwyneth Paltrow in Balmain at the 2008 UK premiere of Iron Man. (Honorable mention: Octavia Spencer at the 2017 Golden Globes–her navy tux was fabulous as well!) ERW wore tons of tuxedos for events recently, and I was very inspired by just about all of them. And Gwyneth’s 2008 Iron Man premiere outfit is still one of her best-ever looks, IMO–I remember seeing coverage of that outfit at the time and haven’t forgotten it. (Or those fabulous square-toed satin McQueen pumps, because goddamn.) I made this Pinterest board so you all can see more of the looks I was inspired by while I was planning out this thing!

Lady Tux: The Big Reveal

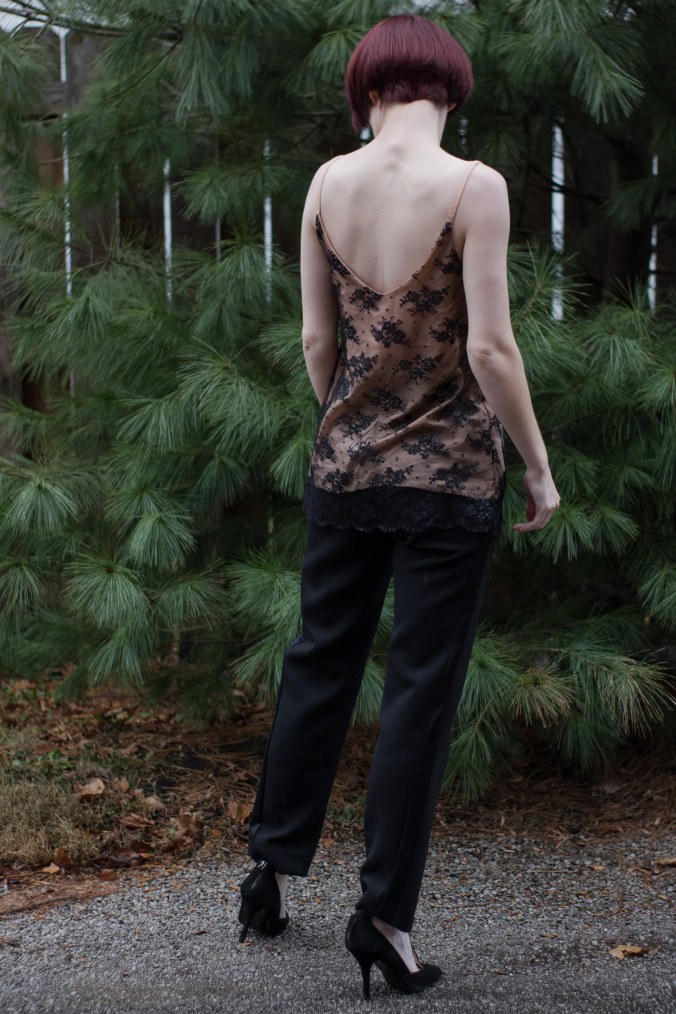
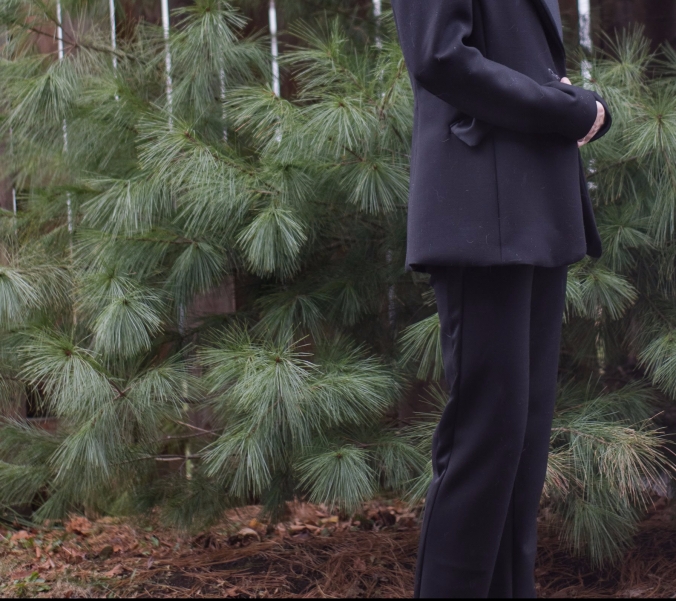
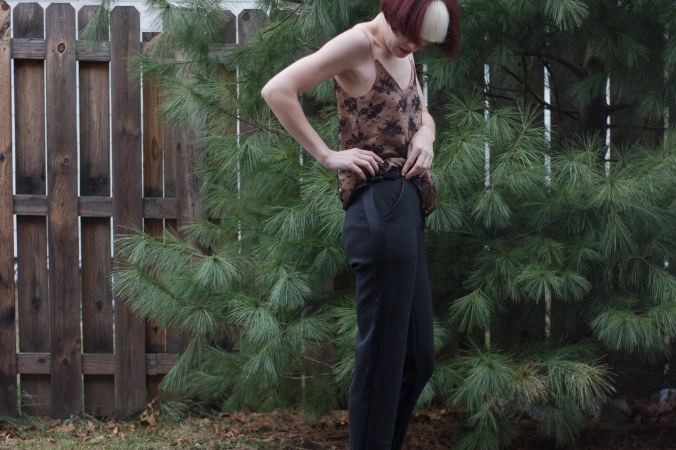
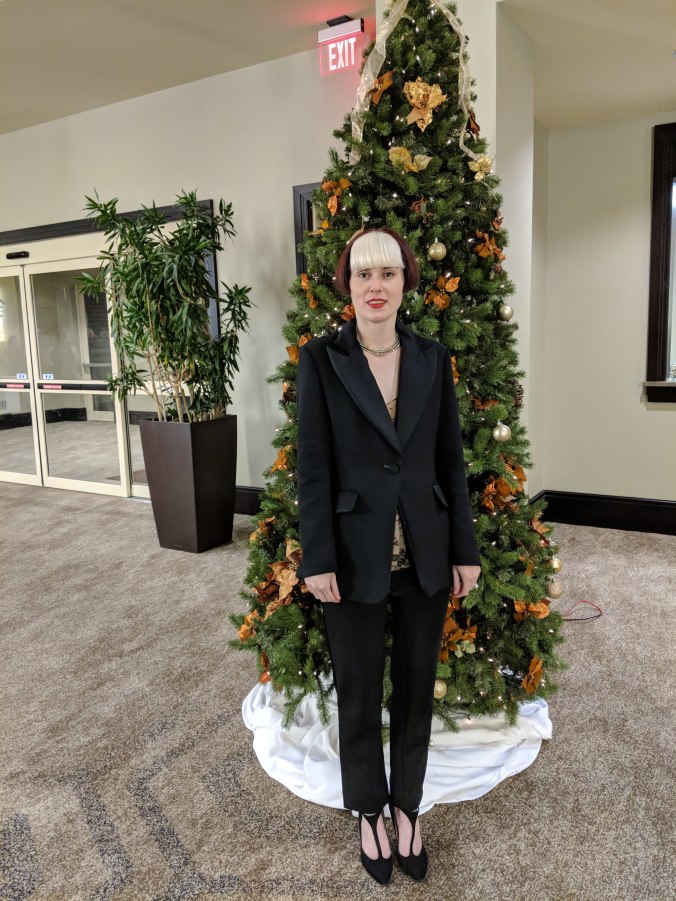
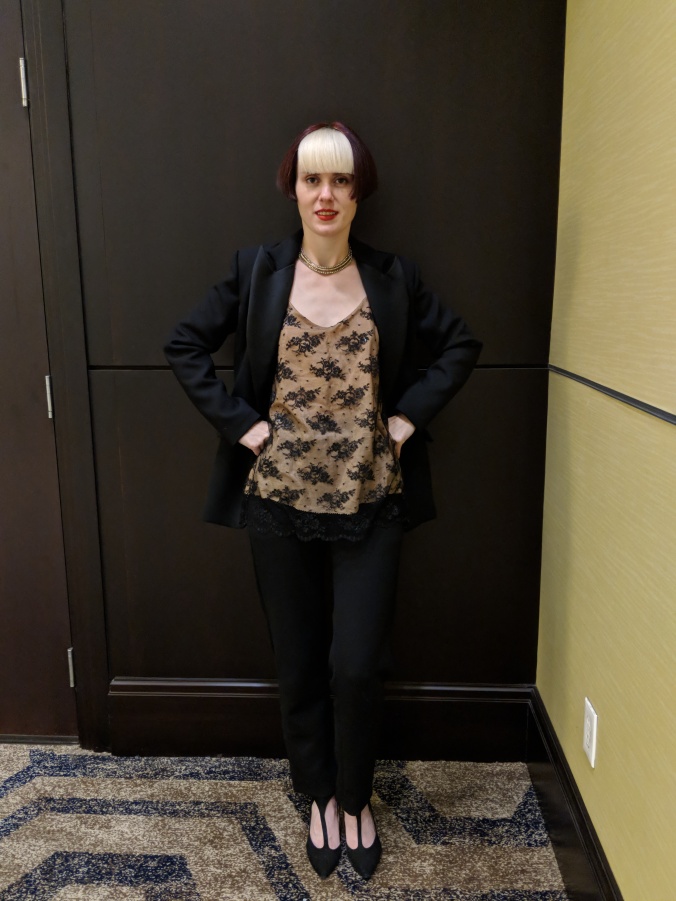
So okay, I wanted a tux. But what would it look like? That was the hard part. In the end, I decided on slim-but-straight trousers with front slash pockets and “racing stripes,” a jacket with a peaked lapel that was single-breasted with one button and which would fall below my high hip, and a lace camisole for underneath (my nod to the Paltrow outfit, basically). I’ll have more detail on all of these things in the next posts!

I used 3 patterns for this outfit: 1 for each piece. O_o The jacket is a Burda pattern that was originally in a magazine but is now available for download: #127B 11/2012. Originally I was hoping for something less shaped and slightly more “boyfriend” in the cut, but there doesn’t appear to be a pattern in existence that fulfills my wants! 😉 This was close enough, especially since it came with jetted pockets and a peaked lapel AND was longer, which I really wanted; I was willing to endure a more feminine cut for those things. The trousers are the pants portion of V9160, aka The Jumpsuit of My Dreams That Wasn’t. Here is where I made a mistake, but more on that later. The camisole is the much-loved Ogden Cami by True Bias.


And as you saw in my teaser photo above, those three pieces came together to make THIS ridiculousness:

abbeytux (16 of 16).jpgabbeytux (4 of 16).jpgabbeytux (11 of 16).jpgabbeytux (6 of 16)

abbeytux (15 of 16).jpg

I won’t go into construction details of each piece here–that’s what Parts 2 and 3 are for–but I’ll share my general impressions with you now.

You can see the Altuzarra inspo in the lapels, which are peaked and done in a contrasting satin-finish fabric, and in the pockets, jacket length, and single-button configuration; my trousers also have the trademark “tuxedo stripe” down the side seams. I didn’t make my trousers wide or flared though, and obviously the styling is a bit different. The Paltrow outfit inspiration is less direct than how I interpreted the tux, since it’s a dress! But I think it looks like I was inspired by that dress, even if I didn’t make the same kind of outfit.

Overall, I’m basically happy with this outfit. I wouldn’t want another sewer to look too closely at any piece of it though–it’s definitely not my best work. I do think I achieved the “look” I was going for: it’s feminine-ish, but very much has that masculine edge because it’s a tux. One of my co-workers commented thusly: “Girl, you are cold-blooded. For real!!” That made me feel like a fucking badass, you guys! (Especially since that co-worker was wearing a totally amazing sequined dress and is enviably tall and gorgeous.) I will say this: I’m not 100% happy with this outfit as a representation of my work, but it does show well. 😉

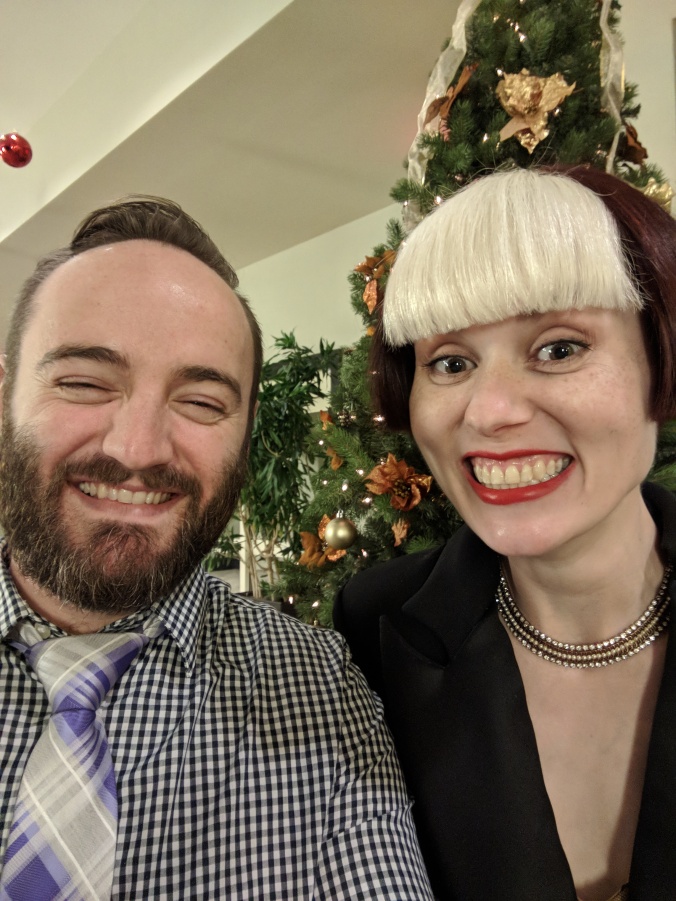
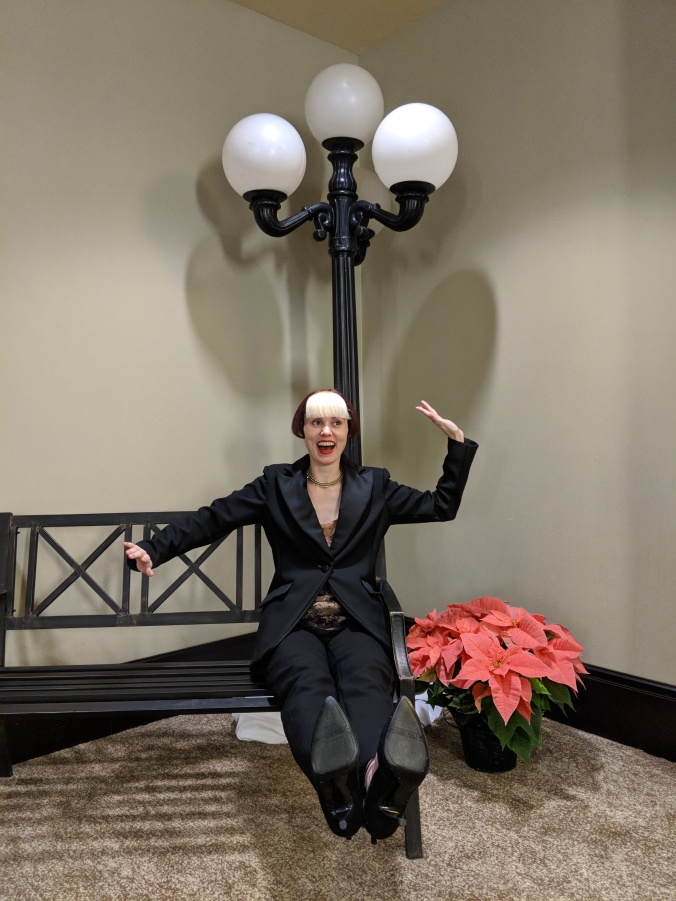
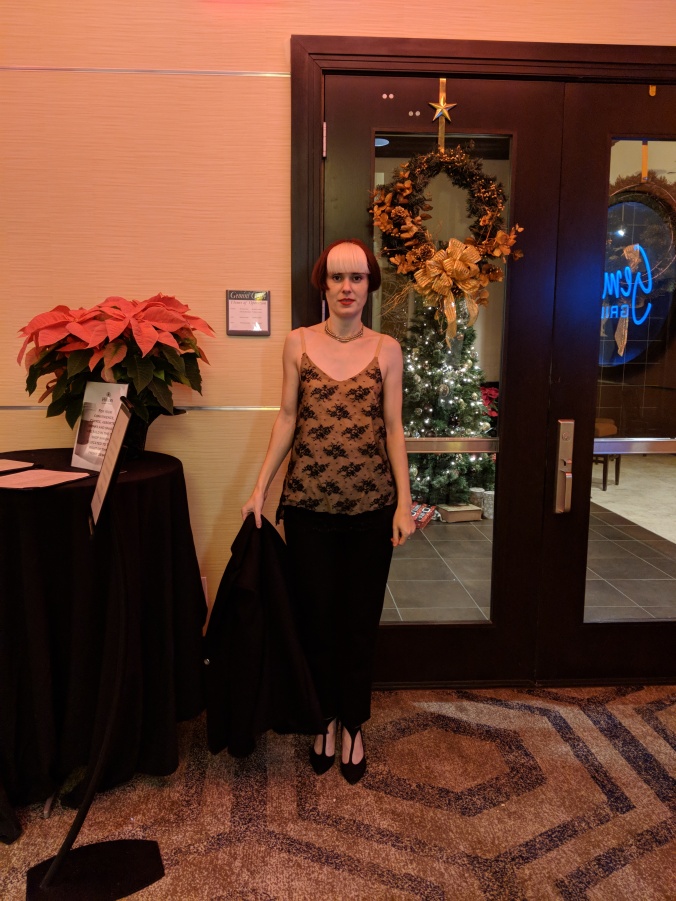
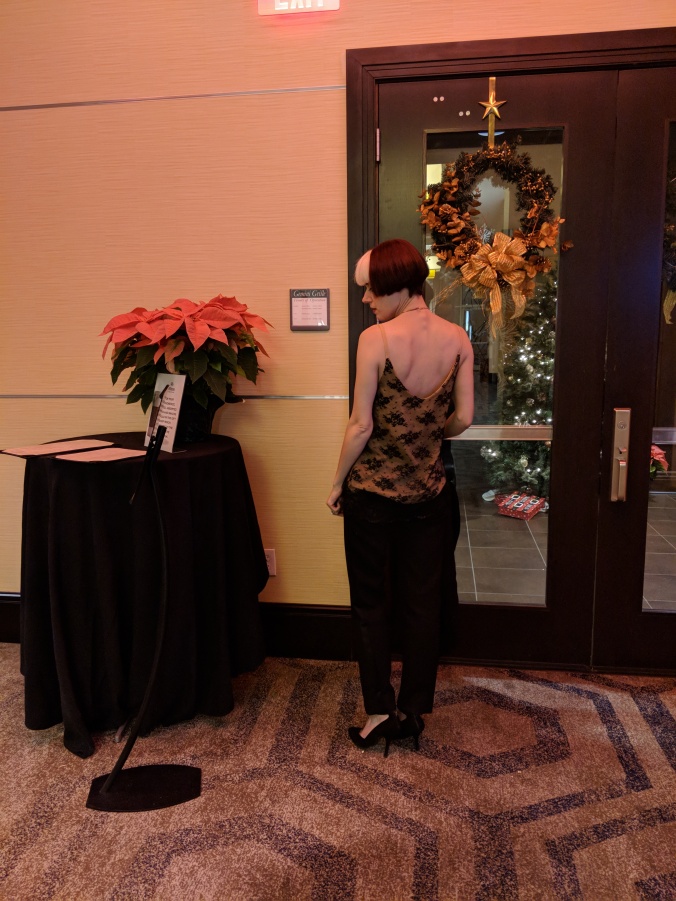
Here are some shots from the party:

MVIMG_20171209_203046.jpg

Xmas Tux!

MVIMG_20171209_203108.jpg

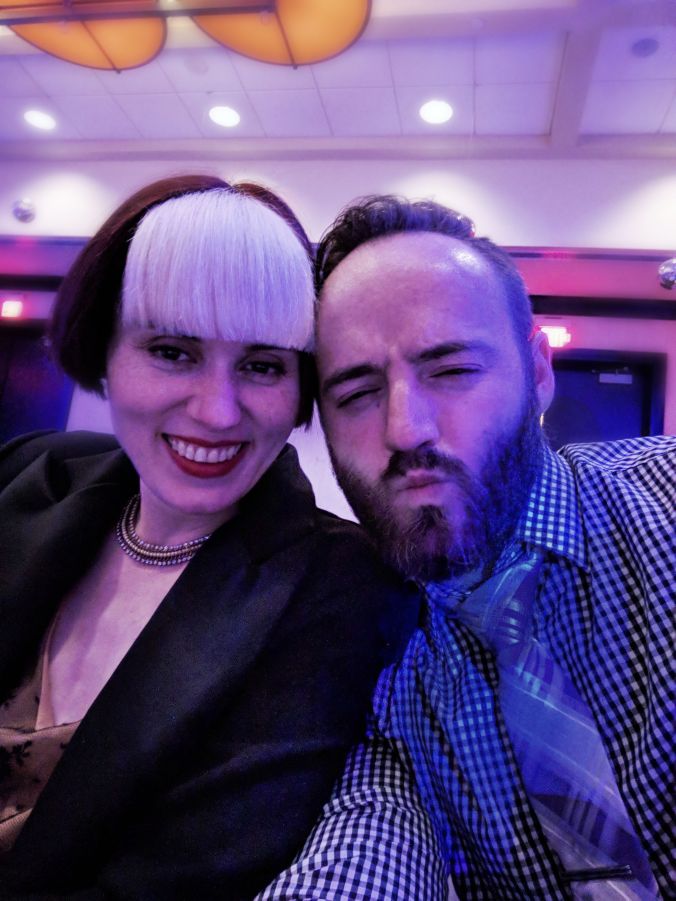
Date night!

MVIMG_20171209_204324.jpg

MVIMG_20171209_204454_1.jpg

Front view, minus the jacket

MVIMG_20171209_204459.jpg

Literally the only time I took my jacket off at the event…

MVIMG_20171209_204622.jpg

Unbuttoned!

MVIMG_20171209_204558.jpg

The button had just broken before we took these. >=(

PSFix_20171214_215605.jpg

One of us had been drinking (sadly, it wasn’t me)…

So now that you’ve seen the whole shebang here, Parts 2 and 3 will cover the “making of” details for each piece.

Thanks for reading! ❤


A Festive, Fiery Dress for Designin’ December (aka The Anna Has Landed)

Welcome! This VERY LONG post has been a long time coming–my initial muslin for this dress was completed during the summer months!–and I am glad I can finally share it with you. But be warned: this project did not end entirely happily.

Before I dive in here, a note about Designin’ December: this fun challenge taps into one of the reasons that sewing your own clothes can be so thrilling: you can replicate a designer or high-end garment that would otherwise be unattainable (due to price, color, limited size ranges, etc.) and make it your own. I love that Linda has gone to all the effort to include other people in her quest for designer style! When she announced this sewalong of sorts, I didn’t think I’d be able to join in–I hadn’t been researching designer dresses when I decided to make this dress–but was looking forward to seeing what everyone else chose and wanted to have in their closet. But as I worked on my dress, I remembered that the Gorgeous Fabrics description for my fabric had mentioned that dresses made in this very yardage had been for sale for several hundred dollars. I decided that some snooping was in order, and while I never did find THE dress made from this fabric, Elie Saab dresses kept coming up in my search results (for “ombre silk dress”).

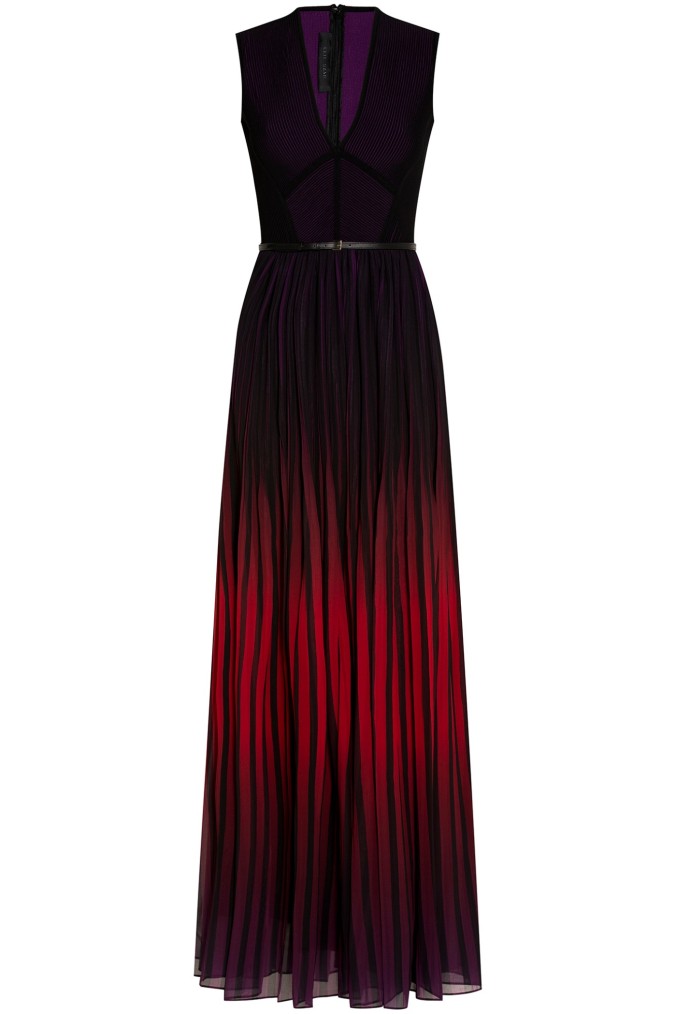
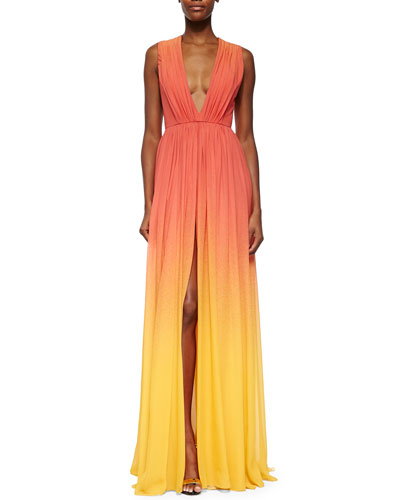
I don’t know about you folks, but I LOVE snooping fashion week photo galleries and slobbering over all the pretties. The evening/red carpet gowns are always near the top of my lust-list, as impractical as they may be! Elie Saab is one of the world’s most awe-inspiring modern designers, in my opinion–his evening wear is second-to-none when it comes to delicate, feminine, dramatic, gasp-inducing beauty. I looked through the selection of ES dresses that were coming through the search and found two that both had elements of my own planned project:

ES 1

Elie Saab ombre dress; Photo property of BySymphony.com

ES 2

Elie Saab ombre dress; Photo property of Bergdorf Goodman

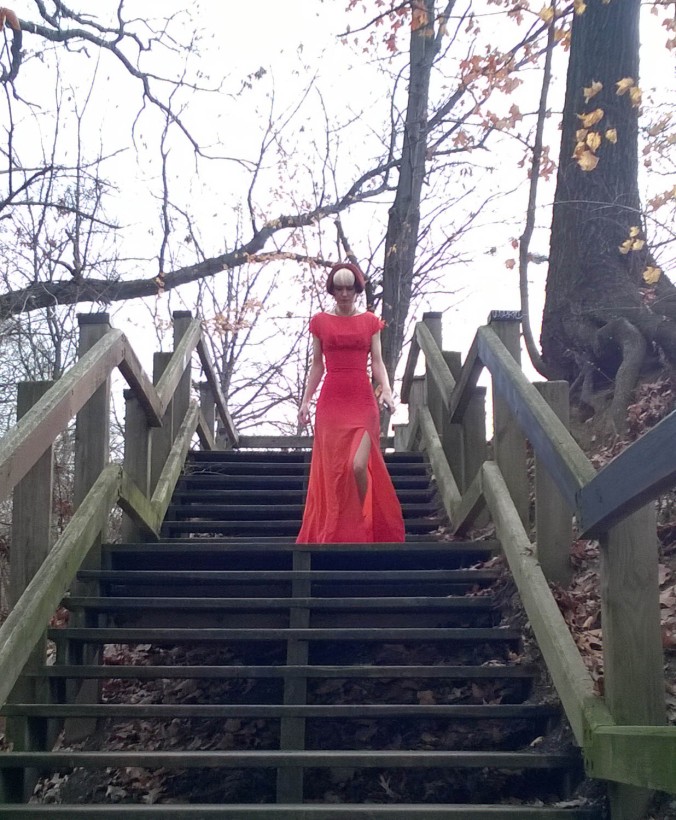
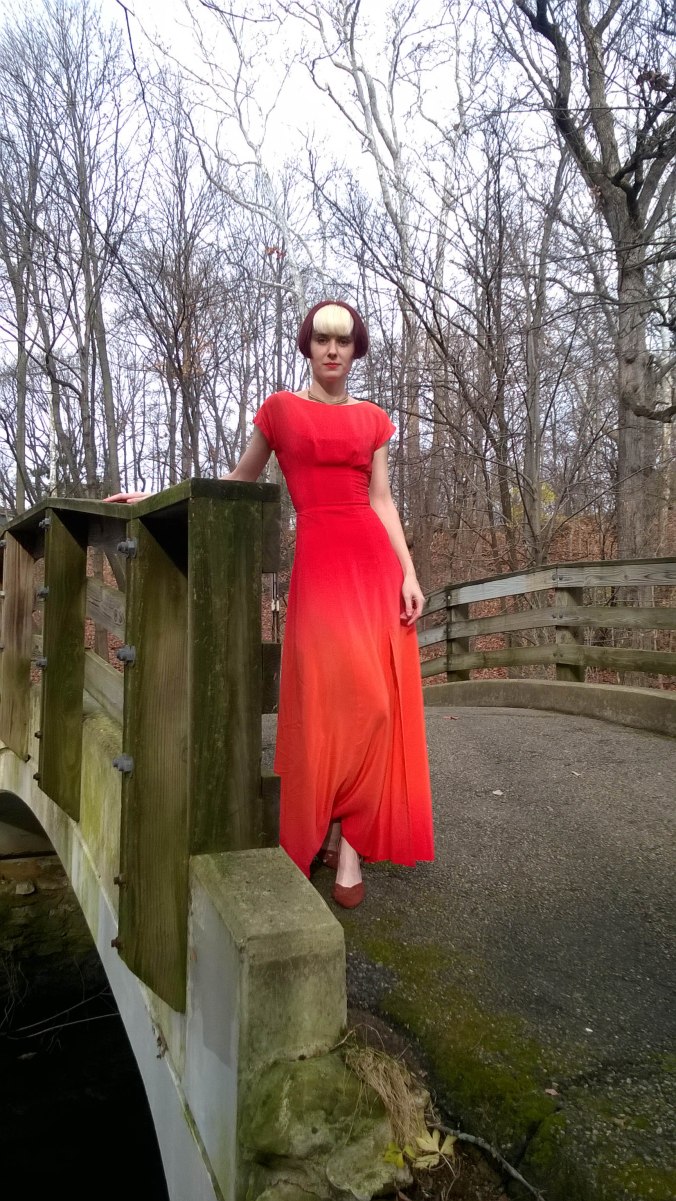
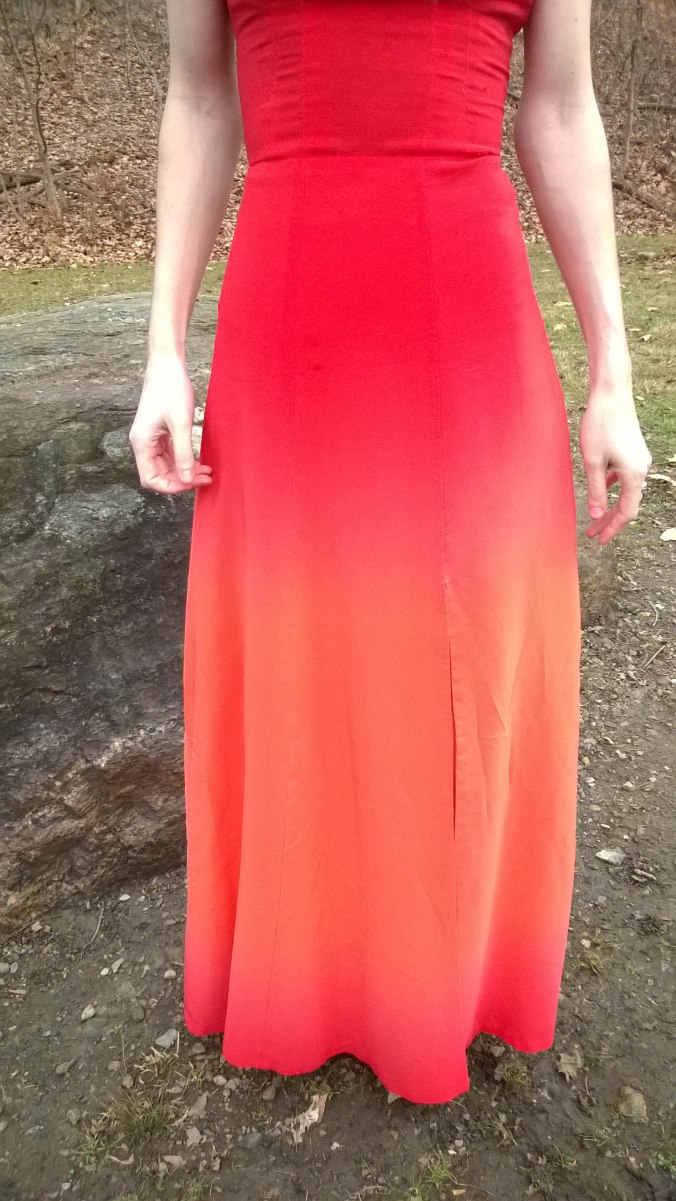
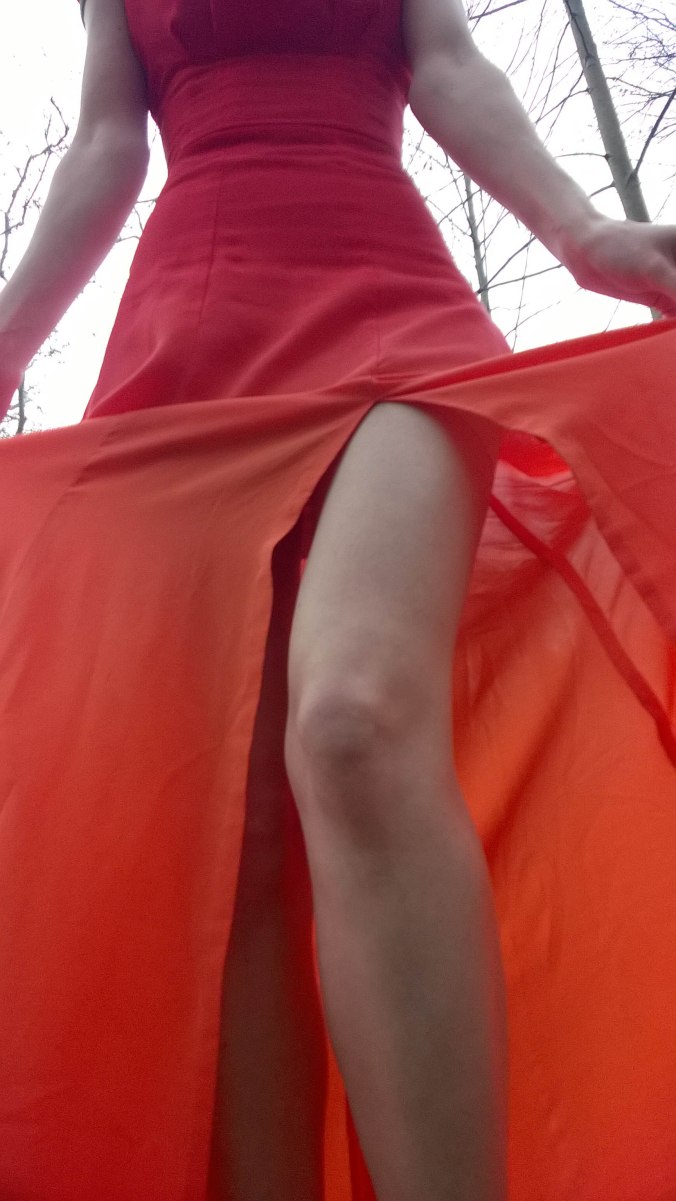
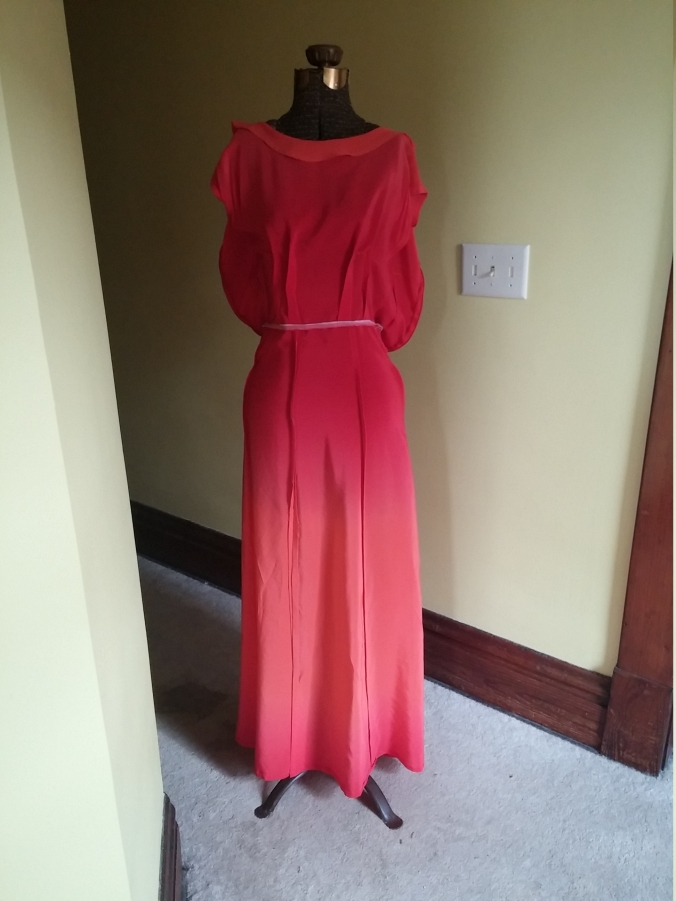
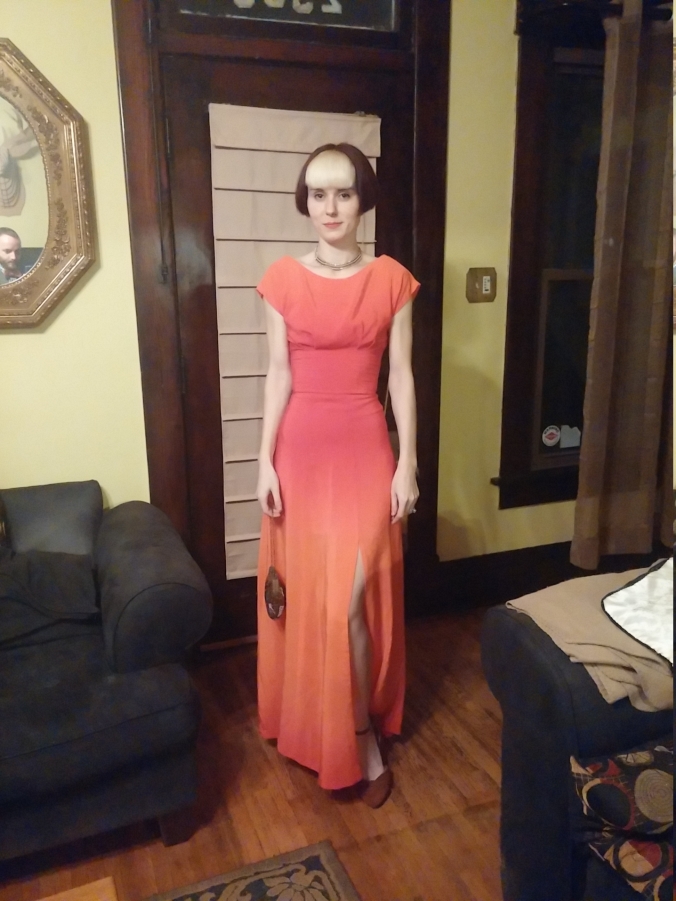
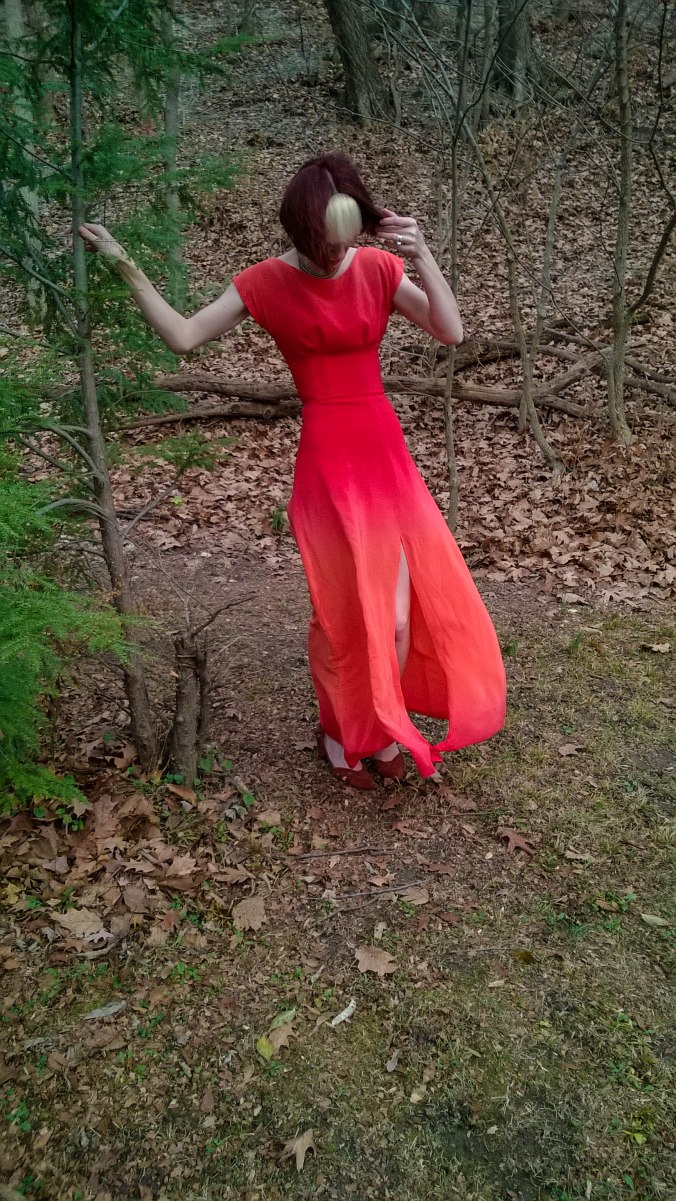
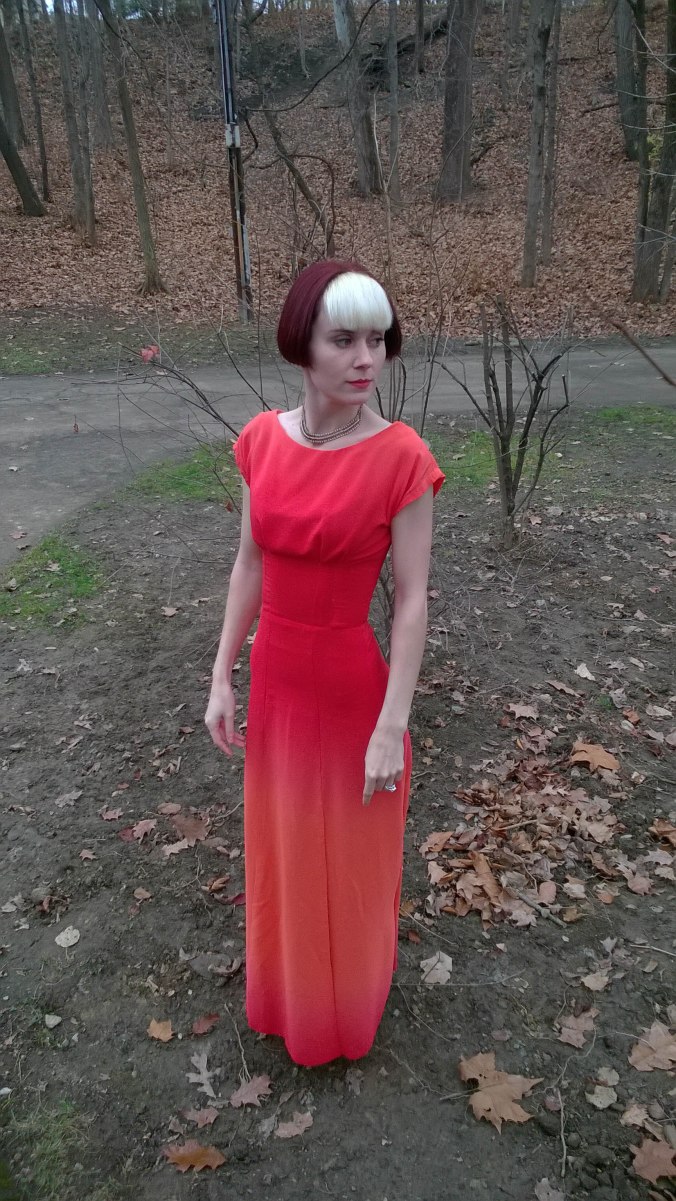
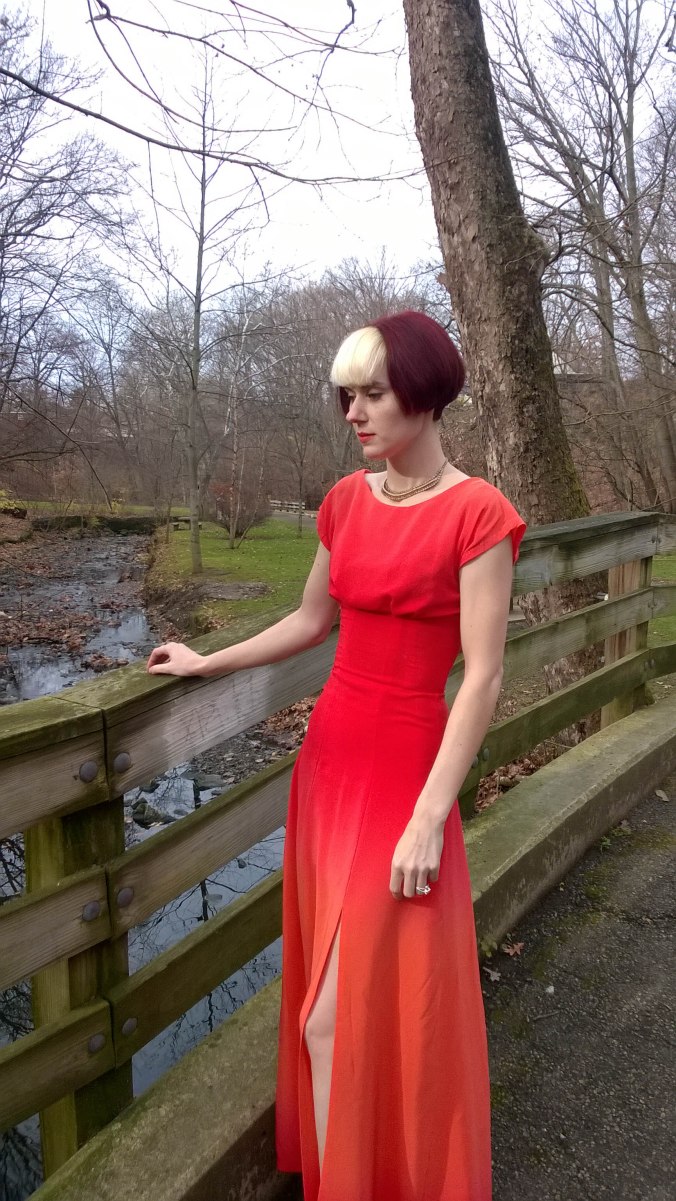
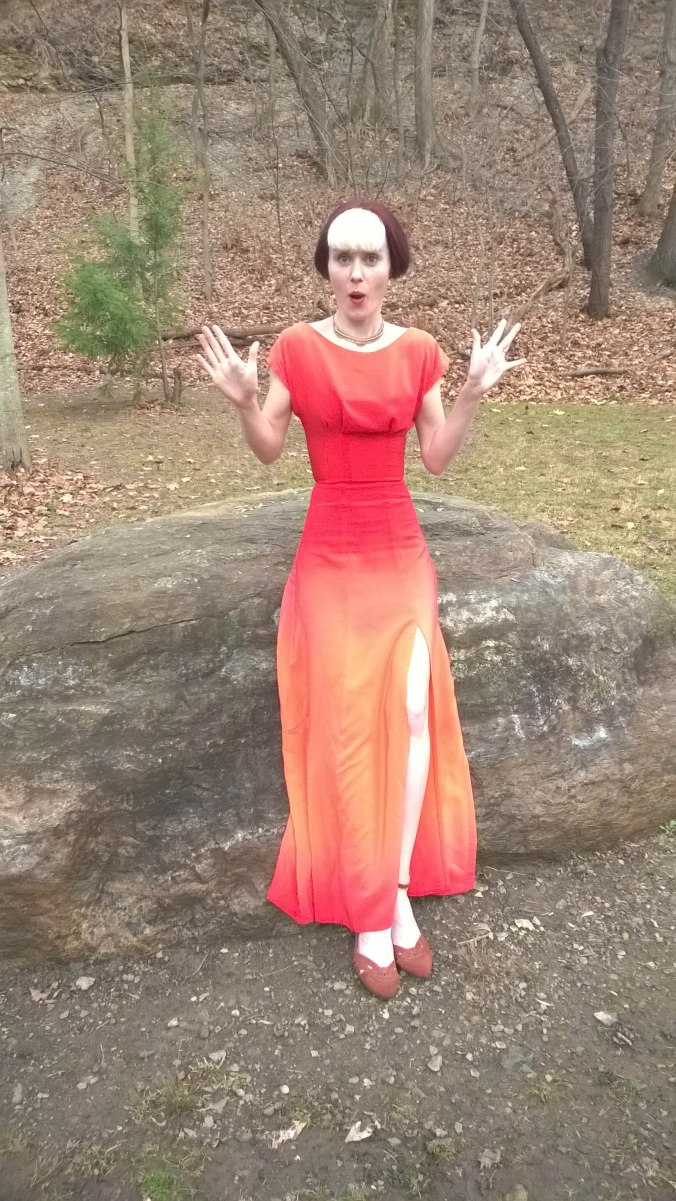
Upon seeing these, I decided to toss my dress into the Designin’ December group just for fun! My color palette is much more similar to the second photo, but the effect I got–and wanted!–is much more like the ombre pattern of the first photo. (But seriously, I would take that first dress in a heartbeat, because WOWWWWWWW.) And of course, I am incorporating a big split like the 2nd dress has! 😉 I did opt for the higher neckline from the Anna pattern, since I would rather stick to showing off ONE bit of skin at a time. YMMV, of course! It helps that my chest resembles something more like a xylophone than bountiful cleavage, and I’m pretty sure nobody wants to see that in a deep V neckline!! But I bet you *do* want to see this dress, right? Drum roll, please…

Anna Dress-1-7

Anna in motion

Anna Dress-9

Reclining on a bridge, as one does

Anna Dress-35

Filtered for lighting, but you get the idea

Anna Dress-23

Bodice and waist

Anna Dress-38

Skirt!

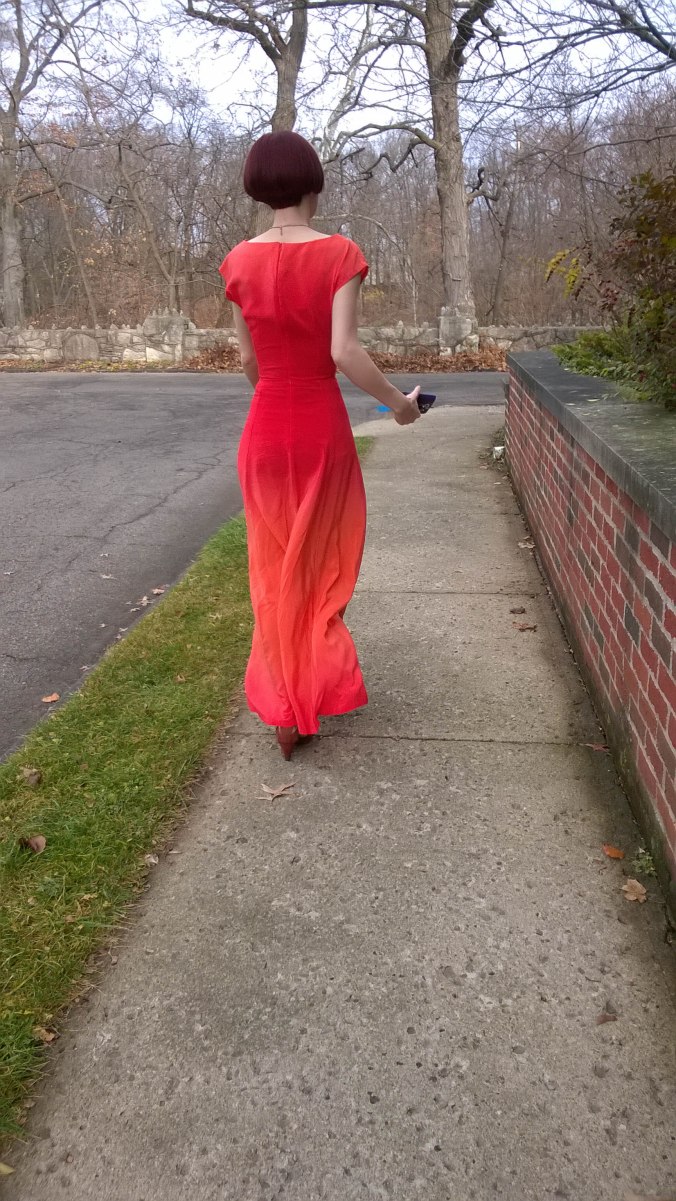
Anna Dress-22

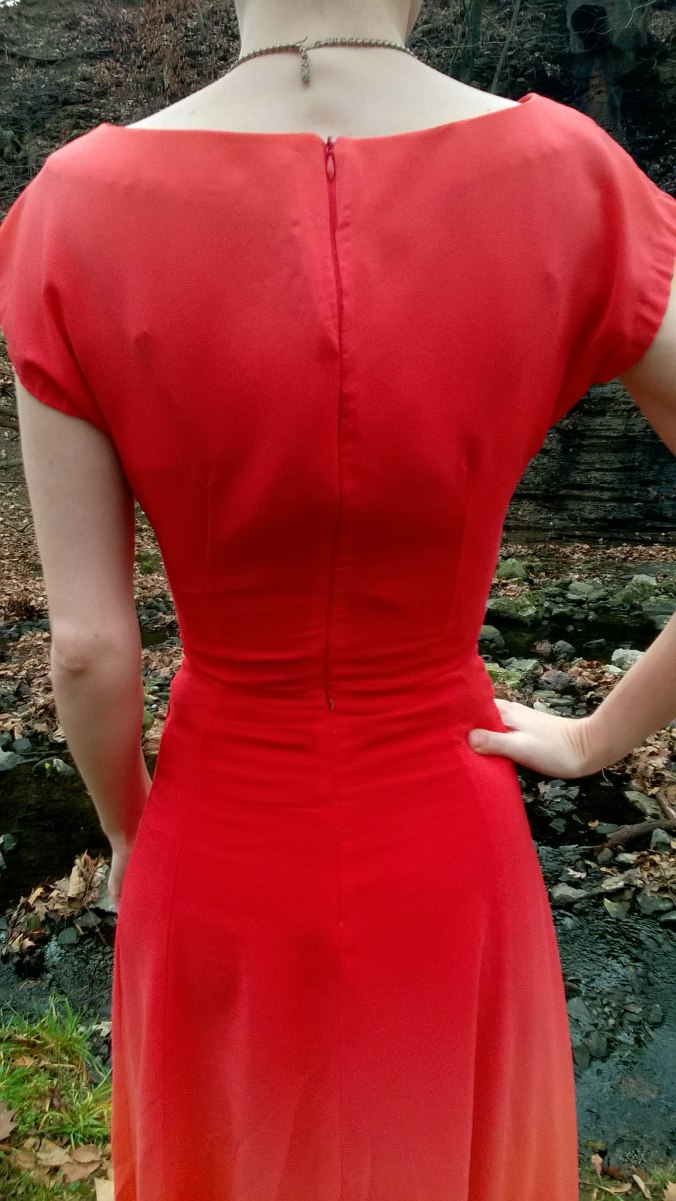
Back

Anna Dress-58

Big front split, up close

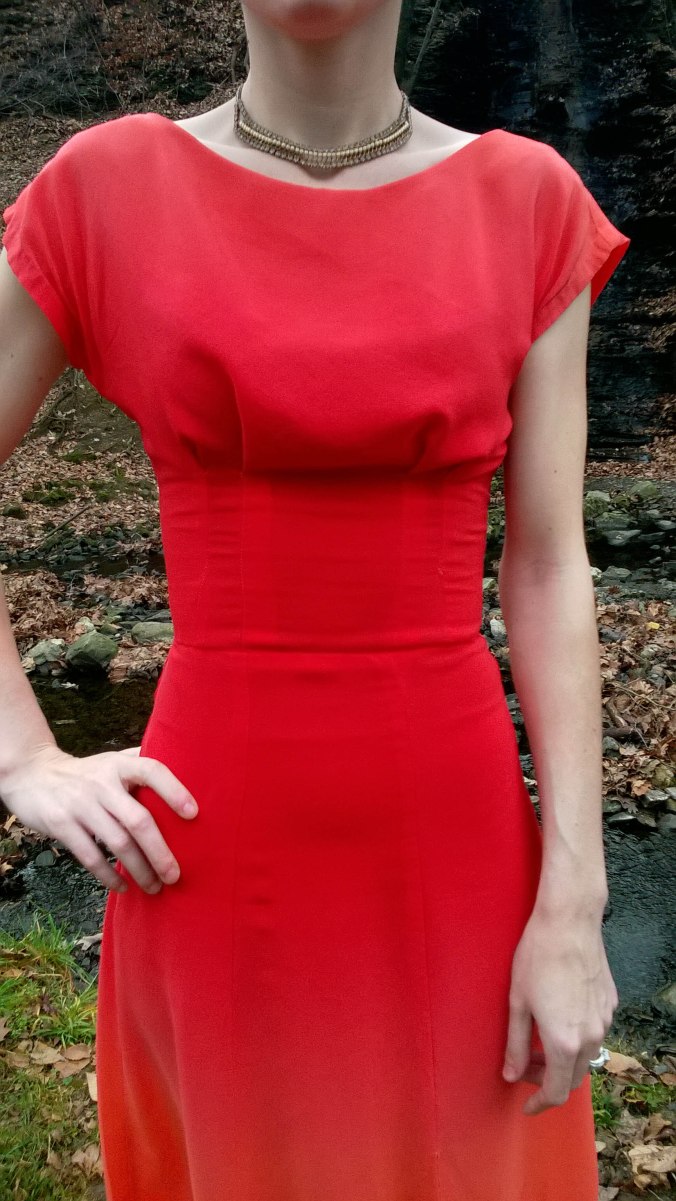
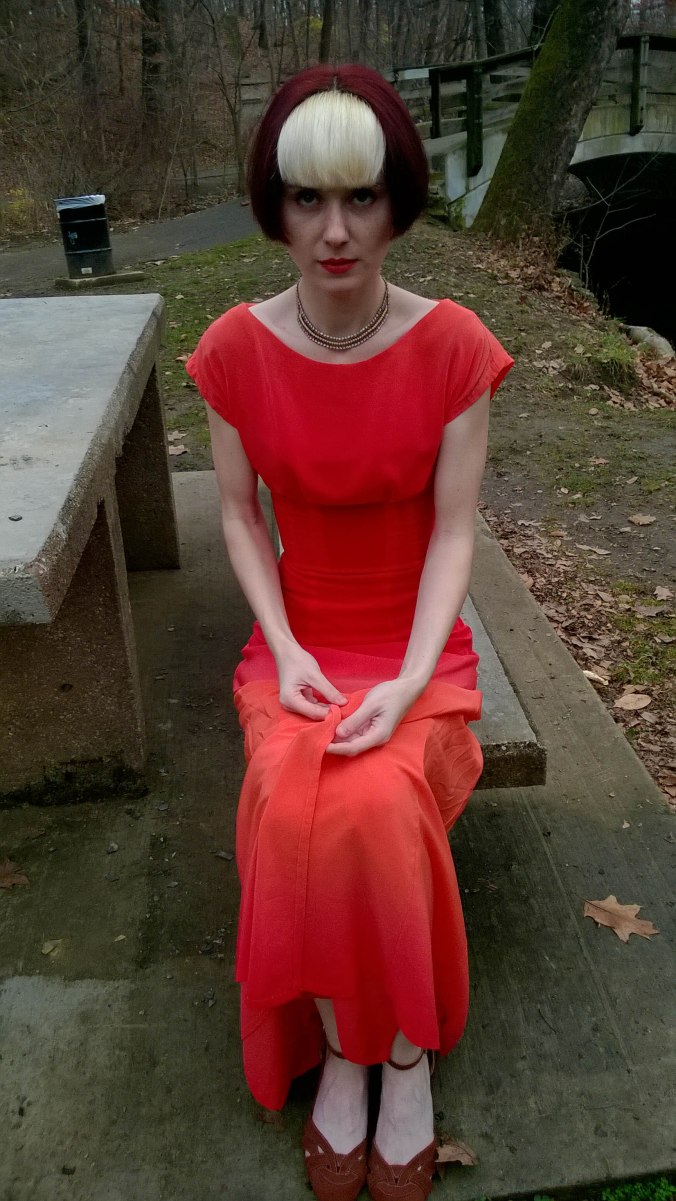
IT’S SO PRETTY I’M GONNA DIEEEEE!!! 😀 The close-up series of the bodice and skirt are probably the truest depiction of the color of the fabric in real life. Now for the gory details:

I did a lot of fiddling with the fit on the bodice, but I had it down. Side seams and pleats were appropriately relocated, and excessive waist ease (all 2+ inches of it) was marked for removal. And then somehow, after tireless preparations (gelatin bath for the silk, anyone?) and conscious choice-making (cutting the dress out on the floor of our non-climate-controlled walk-up attic so that all the yardage could lay flat and not be disturbed by “helpful” kitties), I did something wrong between making the new pattern and cutting out the bodice. The result? A bodice whose waist was about 1.5″ too small for me. (Had I been going for a fully-exposed zipper, it would have fit. But yeah, no.) The worst part? I didn’t realize it was too small until I had assembled THE ENTIRE BODICE, french seams and all, and we were trying to pin the zip opening closed to see how things were going (BECAUSE I WAS WORRIED IT MIGHT BE TOO BIG LOLOLOLOLOL). PSA: try not to do this, especially when sewing meticulous french seams in a silk crepe de chine. You will hate yourself, you will hate your dress, and you will hate literally any living thing that dares to cross your path as you try not to vomit from rage and scramble to fix your fuck-up so that you can wear this damn dress. Note: this is doubly true if you are also dealing with bad things in your personal life when this sewing shitstorm occurs.

The bodice of this dress LITERALLY ended up in the trash can at one point–I knew how dangerous unpicking anything was going to be–and was only grudgingly rescued when I confirmed that I did not have enough fabric to recut the bodice AND preserve the ombre effect the way I was running it. Luckily for me and this demon dress, nobody had thrown away anything gross immediately before or after this tantrum. I believe my last words to my husband as I threw the wadded up, un-binned bodice onto my table and quit for the night were, “I don’t want to be awake anymore.” O_o

Now, since it has been several weeks since I did everything, I am not 100% sure now what went wrong. (That is why I try to start blog drafts when the project begins, which I did not do this time.) Regardless, it was my own damn fault and I had to buck up and fix it if this dress was ever going to see the light of day.

Rather than mutilate myself or go on a tapeworm diet, I ripped out (yep) the outermost pleats in the bodice and re-sewed them much narrower at the waist, tapering to the prescribed width by the time I reached the stopping points; the remainder was picked up by using a 3/8″ SA at the waist area of the center back zipper instead of the included 5/8″. This would not have been quite as possible had my invisible zipper tape not been 3/8″ wide, so thank you, little crappy zipper. Unfortunately, while these on-the-fly fixes solved the zipping-things-up problem, they *also* resulted in the side seams of the bodice no longer matching up with the side seams of the skirt, which as you may remember, I had already painstakingly fixed before sewing the final muslin. Yay! (Not.) My choices were to live with it, or scrap the dress. I opted to live with it. Is this an example of the sunk cost fallacy in action? Perhaps, but here we are. In addition, my silk dress ended up with lots of excess fabric in the back above the waist–and it was much more prominent than it had ever been in my final muslin. Instead of the excess looking like wearing/design ease in a flowing fabric, it looks quite blouse-y and I’m not particularly happy with it. 😦

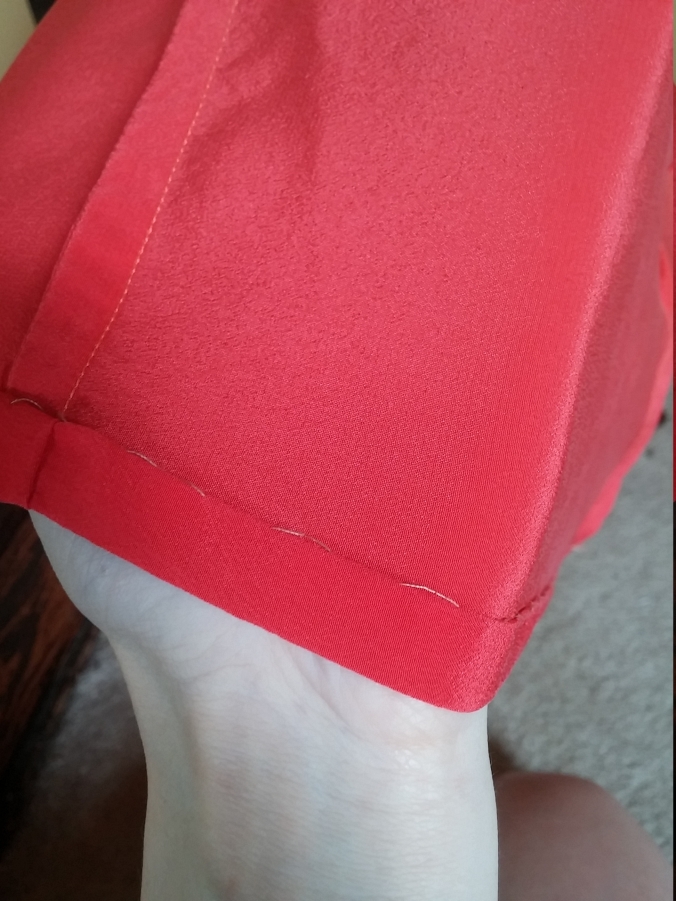
And now for some gloating: I am very, very pleased with my hand stitching on the sleeve hems, split, and one side of the bottom hem. The other side of the bottom looks just as good from the outside–which is ultimately what is most important, right?–but I fell into automaton mode and did a much more visible stitch on the inside and only realized what I had done when I finished and looked at my sleeve hems again. D’oh! I don’t want to rip it out (this project has had quite enough of that already) but it does bother me. Here is one of the good pieces:

IMG_20151213_114103

Hem stitching

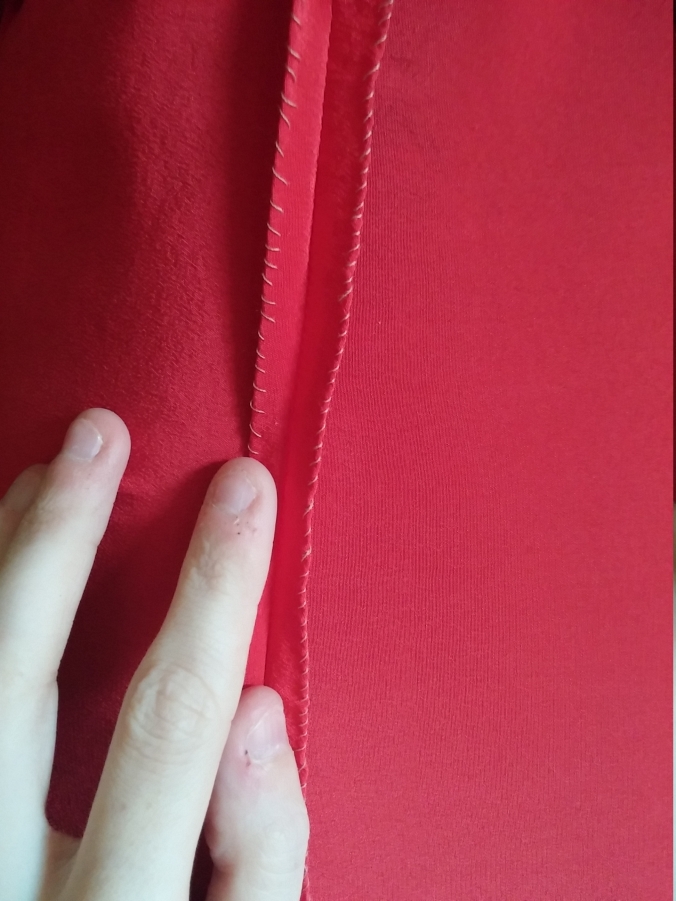
I also decided to do a lot of hand overcasting on this project. I suppose that’s my vintage nerd coming forth–you see that finish a lot in Victorian-era garments particularly–but it was soothing work and I think it looks neat. I used that finish on the CB seam below the zipper and on the closed portion of the front split seam, which were both sewn normally due to the difficulty of doing french seams in those areas.

IMG_20151213_114130

Hand overcasting; obviously the right side was the second stretch!

The entire waist seam was stabilized with silk organza selvedge strips; since the waist ease is minimal (which was what I wanted in the first place) and that seam has to bear the weight of the long-ass skirt, this was absolutely necessary. I may also go back and add a proper waist stay once I stop fuming at this dress, because that would help with both of these concerns and look a bit nicer.

IMG_20151213_114321

You can see the organza here; I didn’t bother zipping it for such a short photo session.

This dress marks the first time I have inserted a zipper by machine. (I know, I know, that sounds stupid. But I like the control and freedom to sit on the couch that I get with hand insertions, and somehow that way always felt more approachable to me from a “this is something I can do successfully” standpoint.) It was also the first invisible zipper I have ever used. I am pleased to gloat say that I got the zip in on the first pass! I do not have a specialized foot for this kind of zipper, but my regular zipper foot was perfectly sufficient. I could have gotten a little closer to the teeth, but that’s about the only complaint I have. Rather than thread baste the zipper in place–which I had done with EVERY other seam of this dress–I used Wash-Away Wonder Tape to stick it down. (#noregrets, because that stuff RULES.) I then sewed the rest of the CB seam; the last step was to attach the facing to the neckline and zipper before putting the dress through a wash cycle to remove the gelatin. The wash went perfectly and the dress was then (clutch your pearls, y’all!) dried in the dryer on an air-only cycle for about 1 hour and 45 minutes. After a final press, this beauty was ready for her debut!

That debut was my company holiday party, and it was quite a hit! Here we are before leaving the house:

IMG_20151212_173714

A little washed out, but you get the idea!

Tom-1

So handsome! (The “Captain Morgan” pose was to show off his new coordinating dress socks!)

Here are a few more photos from today’s outing; we’ve had unseasonably warm weather this weekend, so even though the lighting was utter shit, we took the opportunity to get some photos done without freezing to death!

Anna Dress-19

Anna Attitude

Anna Dress-18

“…are you taking the photo?”

Anna Dress-44

Caught a little bit of the breeze!

Anna Dress-42

Don’t mind my face–this was a great dress pic!

Anna Dress-31

Gotta flash the leg! (And UGH again with the face.)

Anna Dress-2

You know you aren’t a real model when you have to walk to your photo shoot in your evening dress AND carry your own keys and phone…

Anna Dress-70

Pensive

Anna Dress-10

Some more filter tweaks for lighting purposes

Anna Dress-37

Being ridiculous

Anna Dress-36

Pulling a face for y’all

Anna Dress-27

My “Are we done yet?” face

So that’s the skinny (LOLOL see what I did there?!?) on this dress. Please check out other Designin’ December pieces over at Linda’s space, because it’s always fun to see what other people come up with! As for me, I am working out what to make next–goodness knows I have one hell of a queue built up by now! Perhaps something for Jungle January?? 😉

Have you ever screwed up mid-project and had to scramble for a fix? Were you happy enough with the results to wear or use the item?