Selfless Sewing Extravaganza! Pt. 2 (aka A Girl and Her Shark)

As promised (or threatened–however you want to look at it!), here I am with Part 2 of my holiday sewing binge. This one is a riot!

For my birthday last year, Tom got me nice gifts. (But don’t ask me what they were–I cannot remember!) And because he is a total dear, he remembered me going crazy over a stuffed shark sewing pattern that had been released by McCall’s right before my birthday: M7103. He bought me the pattern! And then I let it sit for over a year without using it, because that’s how I roll. But I always knew that I’d come back to it someday.

“Someday” turned out to be Christmas 2015, when I decided to follow through on a vague threat I’d made to my friends with a baby–to sew a giant stuffed shark for their 1-year-old baby. I am sure they thought I was kidding, but I would never joke about something this awesome. I decided to sew View A, the Great White, because it is the biggest shark of the 3 and therefore the best. (Have I mentioned that “JAWS” is one of my very favorite movies? It is.) I bought fleece, giant rick-rack, one square of felt, and some craft-weight interfacing–all of which was a first for me–and got down to it. Within one Saturday (plus cutting out the night before), the shark was complete. He needed about 3-4 pounds of Poly-Fil fluff. O_o

The pattern was actually pretty easy to put together, despite my lack of craft sewing experience. The pattern suggests shank buttons for the eyes, but since this was for a really little kid, I felt that was a choking hazard waiting to happen. I used some of my felt instead, and am really happy with how the eyes look. I just put my big washers on top of the felt, traced the center hole with chalk, and ta-da! Instant shark eyes that are perfectly round and the exact same size. The pattern also recommended decorative stitches–of which I am generally Not A Fan–for the gills and for topstitching around the fins. I used more felt for the gills, and those turned out beautifully, if I do say so myself. The fins just got topstitched with a regular straight stitch. If anyone out there wants to make this pattern, be sure to grade your seams, especially where you’ve got craft interfacing; the pattern says nothing about that, and I think that’s an oversight. That stuff will get bulky REAL quick. I did my best to cut the interfacing out of seam allowances and then graded everything else with pinking shears.

Would you all like to meet the shark (aka Sherk, which is what we called him)?

IMG_20151219_192955 (1)

Landshark vs. Dog

IMG_20151219_193018 (1)

Belly up!

IMG_20151219_193041 (1)

His beautiful gills!

Now, when I asked for this pattern last year, I didn’t do so intending to be selfless with it: I wanted a stuffed shark. I thought it would be fun to have around in a weird, whimsical-stuffed-toy, refusing-to-grow-up sort of way; I thought maybe we could mount it on the wall like a real fish or something. After I finished this gift shark, I realized how bummed I was that I still didn’t have one of my own. So to commemorate our brief time together, Tom took a series of photos of me and Sherk goofing off:

WP_20151219_19_25_18_Pro (1)

He’s a big boy!

WP_20151219_19_27_10_Pro (1)

Watching TV

WP_20151219_19_27_34_Pro

Shark body pillow

WP_20151220_15_36_12_Pro

Sharks don’t need cavities or gingivitis!

WP_20151220_15_37_20_Pro

Story time!

WP_20151220_15_38_37_Pro

So young, and already reading at a 12th grade level!

WP_20151220_15_39_46_Pro (1)

Sherk LOVES fancy chairs!

WP_20151220_15_42_24_Pro

“How’d you get up there, silly Sherk??!?”

WP_20151220_15_42_53_Pro

“Get down!”

Obviously these are very tongue-in-cheek–we thought they would be funny. And they were! We also had fun driving the shark to his new home: he rode shotgun, with his seat belt on, and we turned the front dome lights on so people driving by could see him!  And then we said goodbye to our shark buddy:

A__E376 (1)

Making the drop-off at shark’s forever home

His new human is 14 months old and took some time to warm up to this big thing that some weird lady brought to his house. But once we left, I got a photo from his parents of him going in for a full-body shark hug, so I think this was a success! Bonus: one of the family cats has also taken a shine to him! His family has christened him “Dunuh,” after the well-known sound humans make to mimic the iconic “JAWS” score, obviously; we love the name they chose for him, and I am so glad he is enjoyed. All kidding aside, that was the entire point: he’s a great, giant, fluffy cuddle-buddy for a sweet little child (and a cat). And just in case–because I may not be a parent, but I know enough to have been concerned that a giant 5-foot shark may not be most parents’ idea of a wonderful gift for their kid when it comes to finding somewhere to put it–I also brought a carrot cake for kiddo’s parents to get back in their good graces. All that remains now is to make one for us to keep!!

Thus ends my selfless holiday sewing round-up for 2015. I did make all the Sewaholic Stanley Trees I intended to make, but never got photos of them before they were gifted. Oops! But that is a great little craft pattern, too: I love my tree, and (thank goodness!) my family members really enjoyed theirs, too. The hand sewing parts take a while, but once you get into the rhythm of it, it’s not bad.

Did you do any gift or holiday-related sewing this year? 

Shark Supplies

1 3/8 yds fleece (body), Joann’s
1 1/4 yds fleece (belly), Joann’s
1/8 yds fleece (mouth), Joann’s
1 1/8 yds extra-firm craft weight interfacing, Joann’s
1 1/4 yds 1 1/4″ rick-rack trim, Joann’s
4 lbs Poly-Fil, Joann’s
1 pre-cut felt square, Joann’s

Selfless Sewing Extravaganza! Pt. 1 (aka A Man and His Sweatpants)

Hello everyone, and Happy Holidays! I truly hope that you all had a great holiday season, whatever you celebrate. And now the New Year cometh…where did 2015 go?!? O_o I’ve got 2 posts planned to show all y’all my holiday sewing for 2015–this is Part 1. You’ve been warned!

I have made Tom something for each of the previous 2 Xmas holidays, and decided to go for the Three-peat in 2015. But what to do??? His Cooper bag from 2014 would be hard to top (he still uses it every single day and adores it), I knew that. I almost gave up on the idea of making him something and instead resigning myself to the safe, store-bought option(s)–goodness knows he had PLENTY of ideas–but then fortune smiled upon me in the form of the release of the Men’s Hudson Pants from True Bias in November.

I love the idea of the original Hudson pattern, which is designed for women: the dropped crotch, generous hip room, and slim legs with no ugly elastic ankle casings actually manage to make sweatpants look cool. Not to mention the opportunities for contrast fabric use (or adapting them for woven fabrics), which can really make them into something acceptable to wear out of the house. Not long ago, I could never justify using my valuable and rather scant sewing time on something silly like sweatpants. (I’ve heard of some sewers who don’t want to bother with t-shirts or underwear, so I guess it’s the same principle at work!) But a pair of good-looking sweatpants that could be customized and elevated beyond the “sausage leg” varieties that are so often what we think of when the word “sweatpants” is uttered? THAT is an endeavor I can get behind.

For Tom, I had exactly ONE fabric in mind for this pattern: french terry. (It’s one of the suggested fabrics for the pattern–hooray!) It’s made the rounds in the sewing blog world this year in a big way, and it seemed like a good way to turn the humble sweatpant into something a little more luxe for my love. Combined with the cool vibe of the Hudson pattern, I felt like this was a great idea. In order to maintain secrecy, I taped my pattern together at my parents’ house while I was there for a night and took a “sweatshop day” off from work so that I could have some alone time to get these done. (Aside: it is also highly beneficial that I am The Do-er of Laundry at our house–pre-washing secret yardage is never, ever a problem.) I mentioned a couple of posts back that I am now the proud owner of a serger, and I was determined to use it for these pants:

IMG_20151115_142631 (1)

Juki MO-654DE serger!

I didn’t get into details before, but not only is this my first serger, I HAD NEVER USED ONE BEFORE. As in, ever. EVER. I decided to cut out the pants first, and then run some scraps through the serger to see if I could get the hang of it; worst case scenario was to use my sewing machine for all construction steps, which is how the Hudson instructions are written anyway. A few test scraps and 6 hours later, I had finished pants x 2, fully serged:

IMG_20151212_071740

Inside of Hudson Pants #1

Is my serging perfect? No, but it looks pretty legit IMO. The only sewing machine work I did was to baste things in place and to sew the buttonholes and drawstring casing on the waistbands. Even the ankle bands were attached using only my serger, which is a big deal for me. (Sewing things in the round is ALWAYS a free arm exercise for me–I’ve never done that type of thing without a free arm.)

When it came to Tom opening his gift (his ONLY gift from me), I felt really, really bad: turns out he got me a stand mixer for Xmas, guys. And I made him sweatpants. And I opened my gift first. The whole situation was decidedly Not Cool on the “Miss Manners Scale of Reciprocal Gift-Giving.” But once he realized I made the pants, he got SO excited. He actually thought that I went out and bought him sweatpants!! (I guess that’s a testament to the professional finish a serger can provide on knits, as well as the general fashion-conscious nature of the pattern itself.) And then he tried them on, and now they are all he wants to wear. 🙂 I now wish I had taken a chance and used some black ponte for the pocket bands and ankle cuffs and waistband on Pair 1, because he would have LOVED that and has already asked for another pair with that fabrication. And you can be sure that his not-divorced wife will oblige him…this time.

Truly, I LOVE this pattern. It was so easy to put together and the results are great and much more fashion-forward than your usual sweats. I felt that the sizing was appropriate vs. Tom’s usual RTW size as well, although I did follow True Bias’s advice and measure before choosing a size. I used the best-fitting pair of sweatpants Tom had in his dresser for comparison and settled on the size 32, which is his jeans waist size; the only adjustment I made was to add about 1/4″ to the inseam at the calf. I also cut the elastic so that the finished circumference was 28-29″, like his existing sweatpants. And now for photos! (They’re bad because *I* took them, so don’t expect much, LOL.)

IMG_20151220_155240

Goofing off

IMG_20151220_155330

Attempt at a side view

IMG_20151220_155337

Back view (he wears them a little low)

IMG_20151220_155704

The pocket details and side seam show up better here!

IMG_20151220_155629

These pants are great for Puppy Play Time, obviously.

IMG_20151220_155638

These two, tho…

So there’s Part 1 of my holiday sewing bonanza; coming soon, the story of a Girl and her Shark.

Supplies

2 yds french terry, this Etsy shop; I have about 3/4 to 1/2 yard left
2 yds french terry (same Etsy shop); different color, same amount of leftover yardage
2 yd bundle of 2″ waistband elastic, Joann’s
10 yd bundle of black drawstring cording, this Etsy shop
4 x  cones of MaxiLock from Wawak

A Festive, Fiery Dress for Designin’ December (aka The Anna Has Landed)

Welcome! This VERY LONG post has been a long time coming–my initial muslin for this dress was completed during the summer months!–and I am glad I can finally share it with you. But be warned: this project did not end entirely happily.

Before I dive in here, a note about Designin’ December: this fun challenge taps into one of the reasons that sewing your own clothes can be so thrilling: you can replicate a designer or high-end garment that would otherwise be unattainable (due to price, color, limited size ranges, etc.) and make it your own. I love that Linda has gone to all the effort to include other people in her quest for designer style! When she announced this sewalong of sorts, I didn’t think I’d be able to join in–I hadn’t been researching designer dresses when I decided to make this dress–but was looking forward to seeing what everyone else chose and wanted to have in their closet. But as I worked on my dress, I remembered that the Gorgeous Fabrics description for my fabric had mentioned that dresses made in this very yardage had been for sale for several hundred dollars. I decided that some snooping was in order, and while I never did find THE dress made from this fabric, Elie Saab dresses kept coming up in my search results (for “ombre silk dress”).

I don’t know about you folks, but I LOVE snooping fashion week photo galleries and slobbering over all the pretties. The evening/red carpet gowns are always near the top of my lust-list, as impractical as they may be! Elie Saab is one of the world’s most awe-inspiring modern designers, in my opinion–his evening wear is second-to-none when it comes to delicate, feminine, dramatic, gasp-inducing beauty. I looked through the selection of ES dresses that were coming through the search and found two that both had elements of my own planned project:

ES 1

Elie Saab ombre dress; Photo property of BySymphony.com

ES 2

Elie Saab ombre dress; Photo property of Bergdorf Goodman

Upon seeing these, I decided to toss my dress into the Designin’ December group just for fun! My color palette is much more similar to the second photo, but the effect I got–and wanted!–is much more like the ombre pattern of the first photo. (But seriously, I would take that first dress in a heartbeat, because WOWWWWWWW.) And of course, I am incorporating a big split like the 2nd dress has! 😉 I did opt for the higher neckline from the Anna pattern, since I would rather stick to showing off ONE bit of skin at a time. YMMV, of course! It helps that my chest resembles something more like a xylophone than bountiful cleavage, and I’m pretty sure nobody wants to see that in a deep V neckline!! But I bet you *do* want to see this dress, right? Drum roll, please…

Anna Dress-1-7

Anna in motion

Anna Dress-9

Reclining on a bridge, as one does

Anna Dress-35

Filtered for lighting, but you get the idea
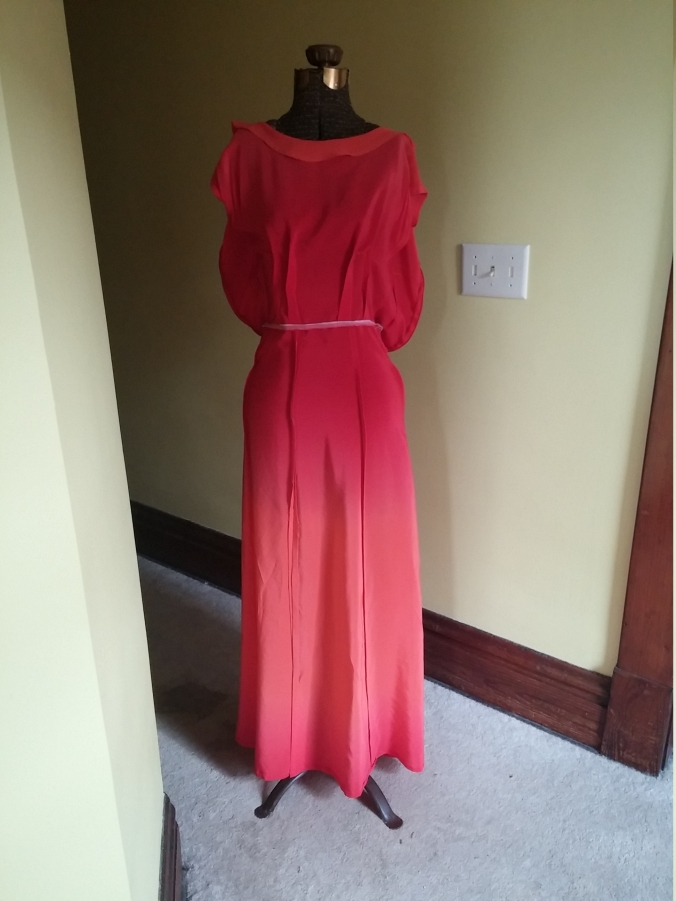
Anna Dress-23

Bodice and waist

Anna Dress-38

Skirt!

Anna Dress-22

Back

Anna Dress-58

Big front split, up close

IT’S SO PRETTY I’M GONNA DIEEEEE!!! 😀 The close-up series of the bodice and skirt are probably the truest depiction of the color of the fabric in real life. Now for the gory details:

I did a lot of fiddling with the fit on the bodice, but I had it down. Side seams and pleats were appropriately relocated, and excessive waist ease (all 2+ inches of it) was marked for removal. And then somehow, after tireless preparations (gelatin bath for the silk, anyone?) and conscious choice-making (cutting the dress out on the floor of our non-climate-controlled walk-up attic so that all the yardage could lay flat and not be disturbed by “helpful” kitties), I did something wrong between making the new pattern and cutting out the bodice. The result? A bodice whose waist was about 1.5″ too small for me. (Had I been going for a fully-exposed zipper, it would have fit. But yeah, no.) The worst part? I didn’t realize it was too small until I had assembled THE ENTIRE BODICE, french seams and all, and we were trying to pin the zip opening closed to see how things were going (BECAUSE I WAS WORRIED IT MIGHT BE TOO BIG LOLOLOLOLOL). PSA: try not to do this, especially when sewing meticulous french seams in a silk crepe de chine. You will hate yourself, you will hate your dress, and you will hate literally any living thing that dares to cross your path as you try not to vomit from rage and scramble to fix your fuck-up so that you can wear this damn dress. Note: this is doubly true if you are also dealing with bad things in your personal life when this sewing shitstorm occurs.

The bodice of this dress LITERALLY ended up in the trash can at one point–I knew how dangerous unpicking anything was going to be–and was only grudgingly rescued when I confirmed that I did not have enough fabric to recut the bodice AND preserve the ombre effect the way I was running it. Luckily for me and this demon dress, nobody had thrown away anything gross immediately before or after this tantrum. I believe my last words to my husband as I threw the wadded up, un-binned bodice onto my table and quit for the night were, “I don’t want to be awake anymore.” O_o

Now, since it has been several weeks since I did everything, I am not 100% sure now what went wrong. (That is why I try to start blog drafts when the project begins, which I did not do this time.) Regardless, it was my own damn fault and I had to buck up and fix it if this dress was ever going to see the light of day.

Rather than mutilate myself or go on a tapeworm diet, I ripped out (yep) the outermost pleats in the bodice and re-sewed them much narrower at the waist, tapering to the prescribed width by the time I reached the stopping points; the remainder was picked up by using a 3/8″ SA at the waist area of the center back zipper instead of the included 5/8″. This would not have been quite as possible had my invisible zipper tape not been 3/8″ wide, so thank you, little crappy zipper. Unfortunately, while these on-the-fly fixes solved the zipping-things-up problem, they *also* resulted in the side seams of the bodice no longer matching up with the side seams of the skirt, which as you may remember, I had already painstakingly fixed before sewing the final muslin. Yay! (Not.) My choices were to live with it, or scrap the dress. I opted to live with it. Is this an example of the sunk cost fallacy in action? Perhaps, but here we are. In addition, my silk dress ended up with lots of excess fabric in the back above the waist–and it was much more prominent than it had ever been in my final muslin. Instead of the excess looking like wearing/design ease in a flowing fabric, it looks quite blouse-y and I’m not particularly happy with it. 😦

And now for some gloating: I am very, very pleased with my hand stitching on the sleeve hems, split, and one side of the bottom hem. The other side of the bottom looks just as good from the outside–which is ultimately what is most important, right?–but I fell into automaton mode and did a much more visible stitch on the inside and only realized what I had done when I finished and looked at my sleeve hems again. D’oh! I don’t want to rip it out (this project has had quite enough of that already) but it does bother me. Here is one of the good pieces:
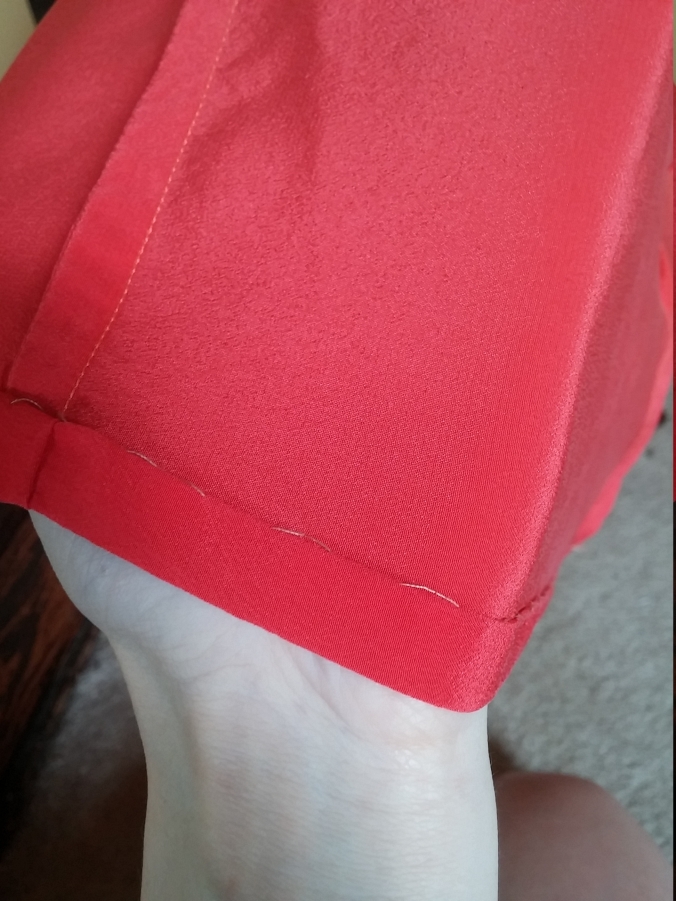
IMG_20151213_114103

Hem stitching

I also decided to do a lot of hand overcasting on this project. I suppose that’s my vintage nerd coming forth–you see that finish a lot in Victorian-era garments particularly–but it was soothing work and I think it looks neat. I used that finish on the CB seam below the zipper and on the closed portion of the front split seam, which were both sewn normally due to the difficulty of doing french seams in those areas.

IMG_20151213_114130

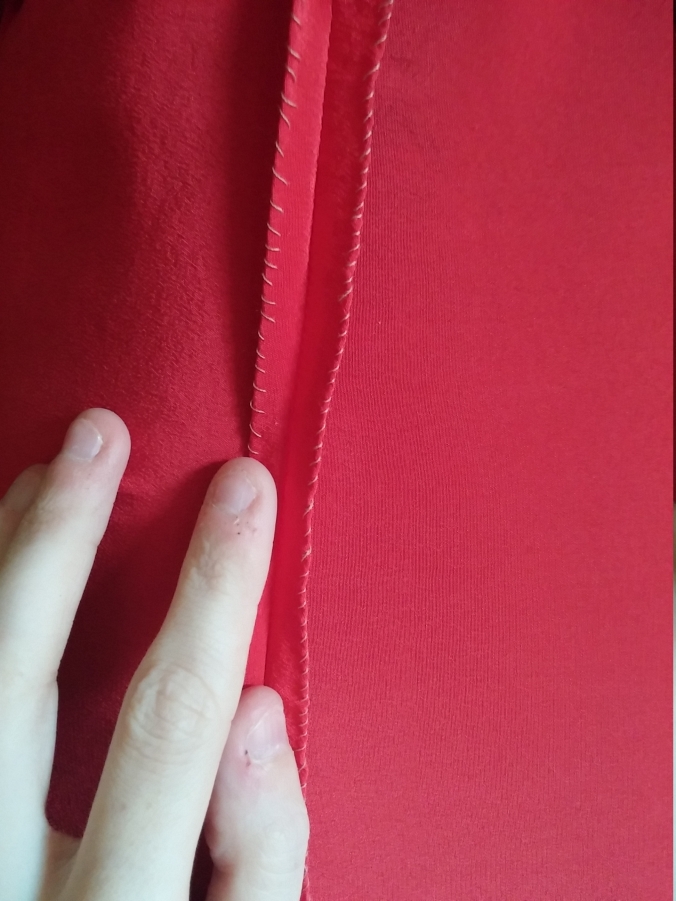
Hand overcasting; obviously the right side was the second stretch!

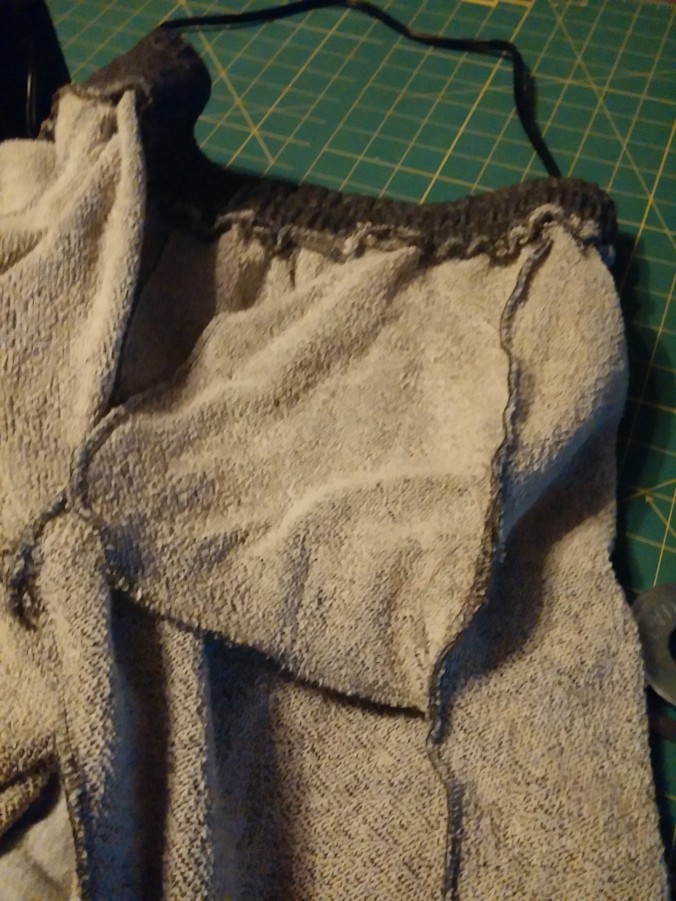
The entire waist seam was stabilized with silk organza selvedge strips; since the waist ease is minimal (which was what I wanted in the first place) and that seam has to bear the weight of the long-ass skirt, this was absolutely necessary. I may also go back and add a proper waist stay once I stop fuming at this dress, because that would help with both of these concerns and look a bit nicer.

IMG_20151213_114321

You can see the organza here; I didn’t bother zipping it for such a short photo session.

This dress marks the first time I have inserted a zipper by machine. (I know, I know, that sounds stupid. But I like the control and freedom to sit on the couch that I get with hand insertions, and somehow that way always felt more approachable to me from a “this is something I can do successfully” standpoint.) It was also the first invisible zipper I have ever used. I am pleased to gloat say that I got the zip in on the first pass! I do not have a specialized foot for this kind of zipper, but my regular zipper foot was perfectly sufficient. I could have gotten a little closer to the teeth, but that’s about the only complaint I have. Rather than thread baste the zipper in place–which I had done with EVERY other seam of this dress–I used Wash-Away Wonder Tape to stick it down. (#noregrets, because that stuff RULES.) I then sewed the rest of the CB seam; the last step was to attach the facing to the neckline and zipper before putting the dress through a wash cycle to remove the gelatin. The wash went perfectly and the dress was then (clutch your pearls, y’all!) dried in the dryer on an air-only cycle for about 1 hour and 45 minutes. After a final press, this beauty was ready for her debut!

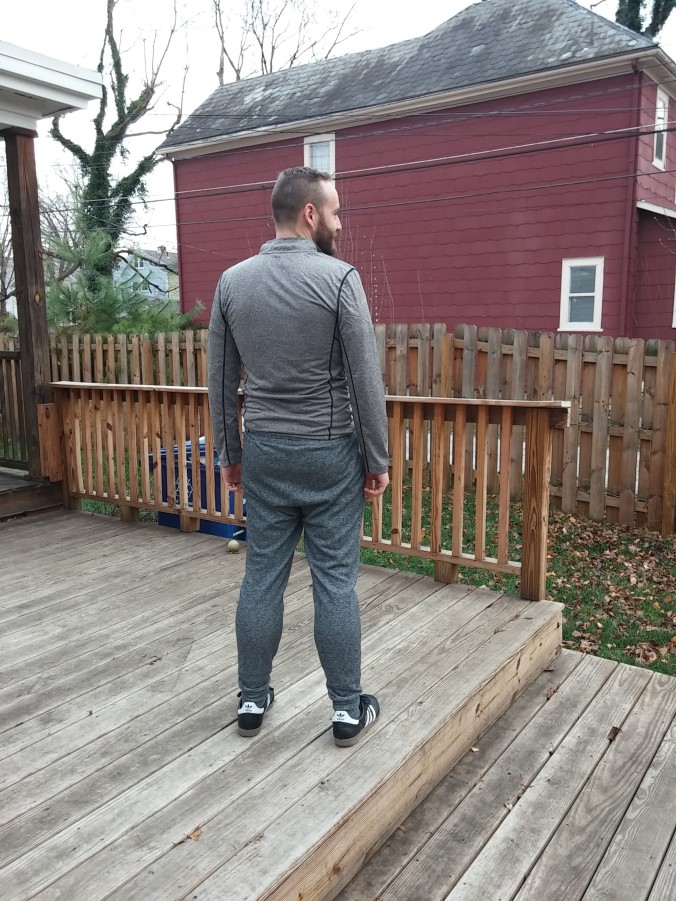
That debut was my company holiday party, and it was quite a hit! Here we are before leaving the house:

IMG_20151212_173714

A little washed out, but you get the idea!

Tom-1

So handsome! (The “Captain Morgan” pose was to show off his new coordinating dress socks!)

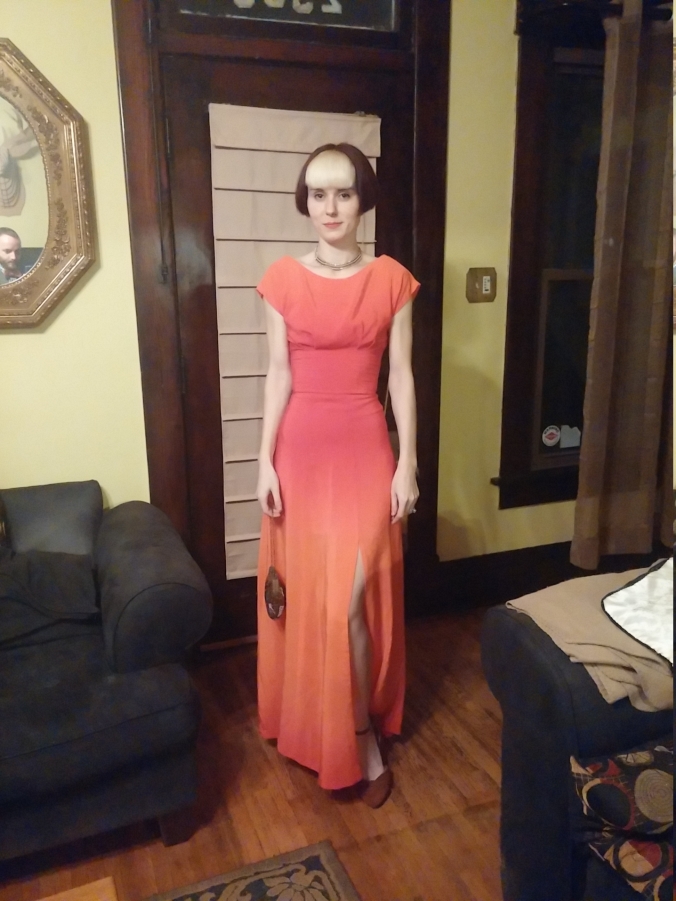
Here are a few more photos from today’s outing; we’ve had unseasonably warm weather this weekend, so even though the lighting was utter shit, we took the opportunity to get some photos done without freezing to death!

Anna Dress-19

Anna Attitude

Anna Dress-18

“…are you taking the photo?”

Anna Dress-44

Caught a little bit of the breeze!

Anna Dress-42

Don’t mind my face–this was a great dress pic!

Anna Dress-31

Gotta flash the leg! (And UGH again with the face.)

Anna Dress-2

You know you aren’t a real model when you have to walk to your photo shoot in your evening dress AND carry your own keys and phone…

Anna Dress-70

Pensive

Anna Dress-10

Some more filter tweaks for lighting purposes

Anna Dress-37

Being ridiculous

Anna Dress-36

Pulling a face for y’all

Anna Dress-27

My “Are we done yet?” face

So that’s the skinny (LOLOL see what I did there?!?) on this dress. Please check out other Designin’ December pieces over at Linda’s space, because it’s always fun to see what other people come up with! As for me, I am working out what to make next–goodness knows I have one hell of a queue built up by now! Perhaps something for Jungle January?? 😉

Have you ever screwed up mid-project and had to scramble for a fix? Were you happy enough with the results to wear or use the item?