Past-O-Rama: Closet Edition

I’m finally coming down from the high of finishing my Hawthorn dress last week, and since I haven’t picked my next project yet, I thought I might start a “special” feature. Every week-ish, I will do a post featuring one of my pieces of vintage clothing. Time for a true story, everyone: I am a collector of vintage clothing. Well, maybe “collector” isn’t the correct word, because I definitely wear all the things that I acquire. I’ve amassed quite a collection in the last 18 months, but my first vintage anything was my wedding dress–an early 1970’s acetate lace number. I had bought a contemporary dress but, to make a long story short, it was ruined by a hack seamstress at the bridal store where I bought it. I found my “new” dress online and was smitten. I took it to a talented seamstress, who altered it perfectly.

Image

The dress before alterations

Image

After alterations–no more strangulation by lace!

I didn’t buy any more vintage until a few years later. My collection started modestly enough (one skirt and one handbag), but now I am at a point where my closet needs to be purged of many of my contemporary clothes to make room for the more delicate vintage items that are overtaking the space. (And by “purged,” I mean kicked out of the closet and relegated to the chest of drawers and dresser in the guest room–getting rid of clothes is realllllllllly hard for me.) My favorite (and really, only) local vintage shop is so reasonable that my collection will only grow! Below is my most recent acquisition: a 1920’s beaded blouse. Completely sheer, naturally. (I always laugh at the notion that clothes were somehow inherently more “modest” all those years ago; a visible slip feels more awkward than a short hemline to me!)

1920's blouse from the front

1920’s blouse from the front

Snaps up the back

Snaps up the back

1920's blouse from the back

1920’s blouse from the back

This blouse is my fourth 1920’s piece, and I love it! The beading is incredible, although some of it has long since fallen off the sleeves. The snaps on the back have held up beautifully over the last ~90 years, but I am very glad that I can fit my globe-like head through the neck opening without unsnapping anything. (As an aside: I seriously don’t understand how the neck openings on clothes from this era are usually so damn tiny! I have to be very careful when putting on my other 20’s pieces because my head barely fits through the hole. And hairstyles back then were waved and curled and slicked to perfection, and I can’t comprehend how anyone could have gotten dressed after having their hair set. WTF?!?!?)

I really love talking about (and showing off) my vintage pieces, and I hope that someone out there thinks old clothes are neat, too. My love of vintage (and vintage patterns) inspired me to learn to sew, so this feature will be extra-fun for me. Thanks for reading!

Hawthorn – Complete At Last!

Image

Happy sewist

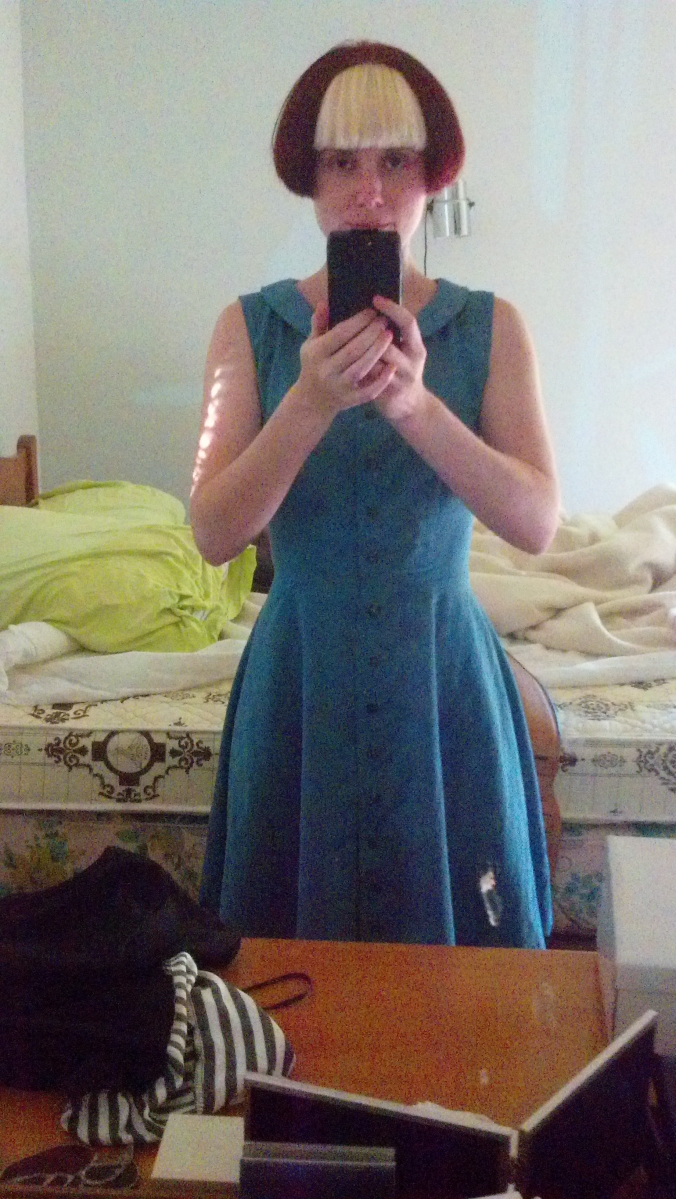
^^That is the face of a content and relieved sewist, y’all. After almost 3 weeks of on-and-off work, I have completed my Colette Hawthorn dress! It turned out better than I could have hoped, and I’m excited to finally share photos. (I was so engrossed in getting things done that I didn’t think to take in-progress photos, so…) Up next, a photo dump! Please pardon the wrinkles and slightly rumpled nature of the dress–I wore it allllllllll day and was too lazy to press it for photos. Photos which, for the most part, were taken by me using my phone, and so are awkward and at silly angles. Brace yourselves.

Image

My shoes for the day: yellow!

Image

Bodice and buttons

Image

Awkward side view, duh


Without the belt

Without the belt

Image

Hawthorn twirl!

I wore my first me-made anything (TRUE STORY GUYZ) to work today, and pretty much floated around the office, like someone with a very happy secret. I’m already addicted to the feeling of wearing something that I made, so there’s some extra, if unnecessary, motivation for me to keep working hard at sewing.

I felt that this pattern was really straightforward, and I’m glad I opted for the sleeveless version, which made things even easier. This was my first time making a collar, my first time making buttonholes, my first time trying french seams, and my first time using bias binding. BTW, I really liked the way the binding was utilized for the armholes on the Hawthorn. I had assumed that it would be sewn along the outside of the armhole as a finish, but it was used to create a facing that isn’t visible from the outside. The finished result looks really lovely (and I don’t necessarily mean my Hawthorn, just in general) and I am glad to have learned that method. I had some issues along the way, of course: I screwed up my first collar and had to re-cut and sew everything, I sewed the bodice to the wrong side of my skirt (that’s what I get for not taking my time and paying attention), and I forgot to lengthen the bodice facings after I lengthened the bodice by 1″. And because all that wasn’t enough, I had to wash the dress before I could wear it! The chalk pencils I use don’t show up very well (and I used white on this blue shot cotton) and so I had to press pretty hard. Since my cotton is so thin, the markings went through to both sides! So the center of my back had a big ole’ “W” on it (my fabric is identical on both sides, so I had to manually mark out which side was serving as the “wrong” one), as did pieces of my skirt. After all the work I had put in, I was so eager to wear my dress, and I was pissed unamused. And of course, after washing, I had to iron it. Again. Ironing is my least favorite part of sewing, for the record.

Flickr is down right now (of course), so my uploads to the official group will have to wait until tomorrow. But I’M DONE AND IT’S AWESOME AND I WILL WEAR IT FOREVER.

Wherein the blogger has no spare time

Can I just say that I’m really glad that the Hawthorn Sew-Along is focusing on versions that I’m not sewing for the next couple of posts??? I am so far behind that it’s making me crazy. All I want to do is sew this damn dress, but life beckons. Dear Life: Please go away for a minute so a bitch can do some sewing!!!

Since it’s me we’re talking about, things can’t just go smoothly during this process. (Not that you knew that, but I have a feeling it will become clear as I post more about my projects. O_o) First, I realized that I had gotten the wrong kind of interfacing upon seeing the photos on the official Sew-Along post(s). I got a very thin web-like variety that is fusible on both sides, so in the end I improvised and made a fabric sandwich with muslin, my interfacing, and my fabric. It worked very well, but I could have done without the extra work and frustration! I screwed up part of the collar, which meant re-cutting, re-fusing, and re-sewing most of the pieces for that. So between all my setbacks, novice mistakes, working, and a sudden uptick in social engagements, I have stalled out right about there. Hopefully I’ll carve out some time tonight and at least get the bodice faced, collar’d, and sewn together at the side seams. (Who am I kidding? I’d settle for ONE of those things getting accomplished.)

Hawthorn Sew-Along – Muslin Complete!

Hello again! It’s nice and dreary here in Ohio–perfect sewing weather, right?!

I cranked out two muslins for the top portion of my Colette Hawthorn over the weekend, and I’m very happy with the fit of the 2nd. (PS: I’ve never actually made a muslin before, but my favorite part was absolutely leaving the plum-colored thread from my last project in the machine and not having to give one single fuck about matching the color. Speaking as a person with lots of OCD issues, that was a big deal!) Below are two photos of the second iteration.

Front view

Front view

Side view

Side view

The first attempt exposed three primary issues: the darts were too long (hitting me right in the, er, “apex”), the waist hit about 1″ above my actual waist, and the armholes were all pinch-y and cramping my pits like no other. The first two problems were fixed by adding 1″ to the length of the bodice; I opted to keep the darts in their original position and not lengthen them (a PITA, since I had to slash and extend the pattern piece and do math to make sure the new dart was the same length as the old one), so now the point hits where it should and the waist hits at my waist. The arms are another story entirely: on the second attempt, I cut the arm opening  marked for the largest size and did not see much of a benefit. (I cut a straight size 0 due to my actual measurements and the finished measurements on the envelope.) I’ve made some marks on the muslin that I will transfer to my traced pattern piece before cutting into my fashion fabric, and that should open them up to a more comfortable configuration. Gonzo re-drafting FTW! My armpits are looking forward to not being invaded by swaths of fabric in the future.

Irritatingly, my additional yardage will not arrive until Thursday this week, so that’s the earliest I can start on the bodice steps. To save myself some grief, I’ve already treated my fusible interfacing so that shrinkage isn’t an issue when I apply it later. Using that stuff is another first for me, and I’m pretty nervous about it. O_o I’ll also be cutting my skirt pieces ASAP so that I’m ready to jump right into those steps. Buttons are still TBD, but I think I will go for the ones below, from fabric.com:

I’d thought about a contrasting color (the same buttons come in orange, and orange is kind of my jam right now) but was afraid of it looking too juvenile. These add just a bit of whimsy while still coordinating with the fabric I picked. Thoughts?

While practicing with these muslins, I took the opportunity to test out French seams. My fabric is very light and presses well and would be a great candidate for that kind of seam. I had no trouble with this new-fangled finish method (luckily). Megan Nielsen’s tutorial was very helpful and easy to follow, and I’m glad I happened upon it over the weekend!

Even though the weather is perfect for staying inside and sewing, we have so much going on that I probably won’t be doing any sewing or prepping until at least Wednesday. And OMG I just remembered that I haven’t even pressed my fabric yet, and that I’ll have to wash and press the stuff coming on Thursday, too. FFFFUUUUUUUUUUUUUUUUUUU.

(I think my internal mantra for this project needs to be, “This isn’t homework–it’s supposed to be fun. Chill the fuck out.”)

Hawthorn Sew-Along!

This might be a good time to reiterate that I’m really new to sewing. As in, I haven’t technically finished a project yet. (Well, I did do two hems by hand for a friend, and have one dress nearly completed, minus finishing the neckline and hemming the sleeves and skirt.) And yet, when I saw that Colette Patterns was having a Sew-Along for the pattern I just got from them, I felt like this was something I needed to do, right now. Here is the link for the Sew-Along (and contest, which I’ll probably participate in as well):

Hawthorn Dress Sewalong

After getting all worked up about this project and how it would be the most fun thing ever, I got a reality check. First, I looked at the schedule and realized that the muslin stage is now over, and the first few actual tasks are upon us. I do not even have the pattern out of the envelope, you guys. But I told myself, “No big deal, guy–you got this. You have 10 yards of muslin and an entire weekend to fritter away. You’ll be caught up in no time!”

Reality check #2: my fabric. I ordered this pattern with a specific fabric in mind: a beautiful peacock-y blue shot cotton that’s very light and perfect for a summery sleeveless version of the Hawthorn. I’ve had the material for weeks, and felt sure that I was all set in that respect. But no. No. You guys, the version of this pattern that I am making calls for 3 5/8 yards; I have 2 1/2 yards. Not nearly enough. And even though I was seriously deep in denial about this fact (“But wait! Maybe you got 54″ wide fabric and 2 1/2 is enough! SHUT UP DON’T TELL ME IT WAS ONLY 45″. YOU LIE!”), I confirmed it with my purchase receipt. So I ordered another piece of the same stuff, 1 1/2 yards, so that I will have enough. I’m hoping I can cut the top portion and the collar pieces off the smaller piece and save the 2 1/2 yard piece for the skirt sections.

On top of all of that, I cannot seem to find buttons that I like in the correct size. I seem to be drawn to 3/4″ buttons, but I need 1/2″ buttons. And I need 13 of them. I am hoping that by the time we’re at the “sew the buttons” stage, I have found the perfect soulmate buttons and they have arrived from Internet Land in time for me to stay on schedule.

Needless to say, these complications aren’t quite what I envisioned when I decided to participate in my first-ever Sew-Along, but I’m thinking this will turn out okay. Assuming that I don’t fuck up the actual sewing portion of the assignment. O_o

I’m tackling the bodice muslin this weekend (a skirt is mostly just a skirt, so I’m not worried about making a muslin of that), which is scary (Colette Patterns are drafted for C cup, and I’m flat an A, so lots of adjustments must be made). I’m hoping to start the first few fashion fabric steps this weekend as well, and will update accordingly. Wish me luck!

Well Hello!

Hi there! I’m Mads*, and this is my blog. (Duh.) After throwing myself headlong into the world of sewing, I decided to start writing about it in an effort to engage with the seemingly AMAZING online sewing community and to keep myself accountable for completing projects and improving my skills. (Turns out I’ve got an epic lazy/procrastination streak.) Making things is incredibly exciting and I hope I’m decent at it.

So, having said the above things, here is a little tiny bit about me: I’m 27 (for now), live in Ohio, work at an office job full-time, and have a serious (and expensive) interest in vintage clothing. I also play guitar and enjoy baking, and live with my husband and 3 fur-kids: Tycho, Saoirse, and Mulder. I dislike getting rained on, swimming, and basically any other activity involving water. I am powered almost exclusively by Coca-Cola and pizza. But mostly, I’m looking forward to sharing my (mis)adventures in sewing with all of you** and getting a new wardrobe in the process!

*Not my real name
**Which is nobody at this point, since this blog is fresh-out-the-oven