Hi! It’s been a little while, huh? You know, I naively thought that my summer would calm the f*ck down after Memorial Day, but I still had too much going on for my liking! (Some of this is stuff I do to myself, like agreeing to participate in an event.) Fall didn’t slow down much either, especially since we WENT ON VACATION ABROAD!!! What?!? I know. Don’t worry, I’ll share that soon. 😀
I haven’t had quite as much time for sewing lately; between stress from work (my role was assigned to a new manager and I feel ways about that…), stress from life, and continuing to struggle with my mental health, it’s been hard to feel creative. And as far as blogging goes, it’s been hard to get motivated to take photos of things once I did finish them. ![]() On top of that, I started
On top of that, I started selling out writing blog posts for my company’s website this year: you’d be surprised how fast that can steal the fun of blogging about a hobby, but here we are.
That said, I did sign up for a block of the month quilt project in August and have been keeping up with it. And it’s easy to take photos of quilt blocks: they just lie there as I loom over them with my phone! 😀 I am definitely not a quilter, but when I saw this pattern–an exclusive at my around-the-corner sewing shop–I had to make it. As you might expect, this project is very EXTRA considering that it’s my first quilt:

Koala cuteness!

Flamingo and Turtle butts!

Blocks 1 and 2 joined

The entire top design! (Photo property of Dabble & Stitch/Cassandra Ireland Beaver)
Here is a link to a photo of the actual quilt top sample–I can’t wait to have mine finished and on our bed…in a year! I’m planning on paying for the designer to quilt mine just like the sample. Personally, I think I will get more out of spending money on that service than I would out of doing the work myself. ![]() #notaquilter
#notaquilter
But let’s rewind, because I have made quite a few other things since my last summer post. Two of those projects were accessories I made to take on vacation, which I will share soon; two others are the garments you’ll see below! (The other others were costume shirts for the vintage and costume shop–8 in total.)
First up, my 3rd Style Arc Ariana dress!

Cute dress, shame about the face!

Back view

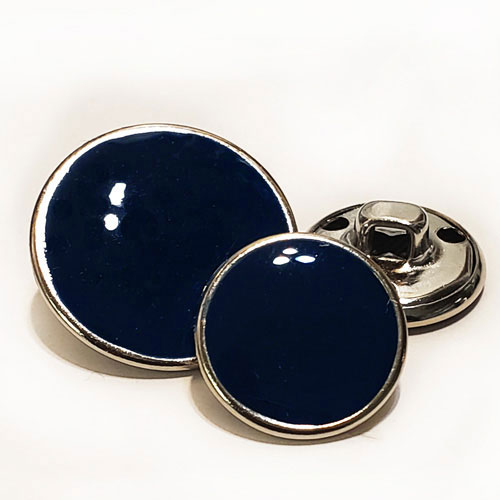
Buttons!
I want you all to know that it was barely 55 degrees when we took these photos the other day: I suffered for you!! 😉
I can’t say enough good things about this pattern. I made two last year, and I would actually like to make at least a 4th one–it’s that good. This rayon crepe fabric was destined to be an Ariana the minute I bought it. It’s perfect, if a bit lightweight. For my bodice lining, I chose to use leftovers from my last Blaire shirt. This was kind of a bad choice, in that the fabrics behave quite differently to each other; but it worked out okay in the end, and there’s no risk of print (or nip!) show-through here.
There are a few dumb mistakes on display with this new dress, namely on the skirt buttons. Originally, I made this dress because I wanted to wear it to an out-of-town family thing this past July. I was actually ahead of schedule–yay!–which meant I was thisclose to having my dress done in time for a last-minute dinner I was invited to in June. I won’t get into it, but it was a (casual) dinner full of strangers who were Important People at an event I was helping with that month. While eating meals in front of other people is one of my actual worst nightmares, I wanted to attend to make a good impression and meet everyone ahead of the event. I don’t know about you all, but I always feel much more confident in a self-made garment when interacting with Important People and/or New People and/or People Who Stress Me Out. So anyway, buttons and buttonholes were all that stood between me and feeling my best at this dinner. The day of the dinner (yep…) I pulled out the front bodice pattern piece to see how far apart my buttons were supposed to be, marked the dress, and got to work. Unfortunately, I forgot that the skirt buttons are spaced farther apart than the bodice ones for Very Good Reasons. I used the correct number of buttons, but the skirt opened far higher than it should because the buttons were too close together! D’oh. Before my next event–the one I was originally making this dress for–I went back and added 2 more skirt buttons. The buttons, by the way, are from Bennos and are made of coconut shell. I love them and will for sure have to buy more when I run out.

Twirling

Derp
I also neglected to stay stitch my necklines, which I should have done at least on the shell; there’s some slight gaping around the curves. (It doesn’t help that I put my top buttonhole too close to the edge, so now I actually need to move the button over a bit to compensate.) The pockets aren’t my best work either, namely because I decided to try flat-lining them in the bodice lining fabric. They’re pretty sloppy at the bottom hems. 😦 My hope is that they pass the “3-foot” rule and nobody else will really notice. I mean, in the above photos you can’t even really see the pockets, so I think we’re good!
And now for something totally different: a knitted sweater!

Bear and Dog

Half-brioche faux seams

Back view–love those triangle details!

Weeeeee!
This is the Ursa sweater by Jacqueline Cieslak. Jacquie is a fairly new knitwear designer but she definitely has a talent for it! Her instructions are really good, and I especially appreciate the way she breaks down your total stitch count between the front, back, and raglans here. It makes counting them up so much more intuitive!
I did modify this sweater a bit by lengthening it: it’s quite a cropped sweater and is even shorter on long torsos! I didn’t want to have to wear a shirt under it, or be limited to wearing it over dresses. In all I think I added about 4″ to the length before starting the triangle insets. Sadly I need to properly block it in order for that extra length to really “count”: it’s still in over-dresses-only territory. While knitting this I had to pay attention to my mechanics on the half-brioche parts: my method of knitting actually positioned the YOs on top of their companion stitch, so I had to re-orient those stitches when it came time to knit them. My first start on this sweater revealed the issue, so I frogged it back and started again. After that, it was looking exactly like the pattern (albeit a bit more open)!
My gauge is off on this sweater. My stitch gauge tends to work up tighter than a pattern’s specifications, and this is no exception: my sweater doesn’t have the same boxy fit that the samples have. Plus, with my broad shoulders and upper back, the raglan shoulders on the size I made are getting stretched to the max! My fabric also seems a bit looser/more open than Jacquie’s samples, probably because my yarn is kind of in between Aran and Bulky and probably needed a smaller needle than what I used (the US10.5 listed in the pattern); this is moreso on the row gauge but does show up on the half-brioche areas too. So for future versions, I will probably need to go up at least one if not two sweater sizes for my shoulders and maybe drop my needle size (which may necessitate going up yet another sweater size). I’ll play with things and see, but I would love another Ursa or two in my life!

Still handsome

Admiring glance
Ironically, the sweater itself was out of season when I made it–in fact, Ohio was in the middle of a news-making heat wave about the time I finished–and now the temps are cool enough that I need to figure out how to style my pink (Ariana!) dress with tights and boots if I want to wear it. D’oh!
As far as current projects go, I have my Halloween costume underway (one piece is done!) and a non-costume Halloween-y dress cut out. I also have another sweater project going, so I’ve got plenty to keep me occupied for now. I’m excited for “proper” fall sewing though: I want to make SO MANY trousers!!
What are you sewing (or knitting!) right now? Do you have any tried-and-true tricks for deciding what to make next?


.jpg")
.jpg")


")
")


